Well to start with on this build, I gotta throw in some pics and give the premise. I had some kits lying around that I wanted to work on, since I'm waiting for my Drehksturm rifle to be printed and sent to me. Saying as I like to make use of my time I figured I should do a fun build, or at least start it. I decided to use my 1/100 SMS Nightingale and 1/100 SMS Hi-Nu Gundam conversion kits in an epic dual straight out of Manga history. Given I haven't read the Manga, or even seen much of the Char's Counterattack OVA (which I know featured two different mecha the Sazabi and Nu Gundam) but I know the basic storyline. I am going to have these two kits fighting over top of the Axis meteor base. The base itself will be mainly all made of cellu-clay for the rock parts, and the docking bay will be styrene. I intend to have a few scale astronauts coming out of the docking bay through some smalller hatches and to have some LEDs for lighting in it. The mobile suits themselves will be modified somewhat, kind of my way of adding my touch to the kits. I can't help myself I love to scratchbuild stuff. Anyway here are the two kits I'm using:

I have already started modifying the Nightingale, mainly as I like it more and I wanted to do the fun stuff first. I figured the kit needed the leg armor flared out, extra toes to match the original design, and the funnels needed to be in an action pose, and that meant they needed smoke trails to support the wires that hold them suspended above the shoulders. Here were my rough sketches of the areas in question that I doodled on my phone:
I also planned to replicate the smoke trail effect I had previously done on another of my dioramas which looks like this:
So I gathered up my materials for the smoke trails first as it's the easiest to do.
Here is what it looks like with the funnels suspended with the unpainted styro-foam smoke trails.
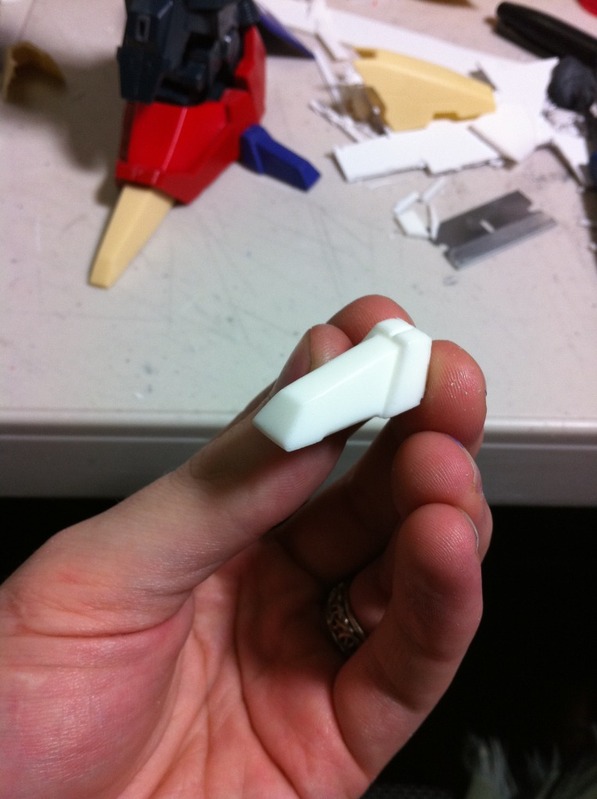
Next I made a rough toe shape to make the extras.
I also decided to add some machinery and bulk under the crotch armor, cuz quite frankly it looks like a huge penis. I wanted to lessen what I call the Giant Mechanical Dong Effect by changing the shape some, so I made this.
I think it was a good choice and it looks good. It actually just slides in under the resin part and can stay in by friction alone. Course I will glue it, but I'm glad to know I can make a snug fit.
Next I used some E-400 Plumber's Apoxy to flare out the leg armor. It's a two part mix that you knead together and it cures hard as rock in a few minutes. Then you can sand it or cut it or whatever you want.
I did this to both sides, and then I wanted to smooth out the seam of the putty so I used filler putty and then painted the parts to make them one color. I had a purple can of tamiya sythetics laying around so I used that. I will paint over it later, but it works as a primer of sorts, and no need to set up the airbrush.
Next I made the toe defined in shape and detail, and did the same for the rear heel claw I made. I also added some ridges to the leg armor to continue the shape that is on the inner leg armor. At this juncture I also made some casts of the toes to use on the other foot.
So the Nightingale is pretty much done being modified, and I want to move on to painting, so I just took apart the resin parts to soak in it's purple power bath for 24 hours.
I will get back and update this as soon as the soak is finished. For now that is all!


nice blog bro!!! and Good luck on your WIP!
ReplyDeleteI added your blog link on my blog list .MORE POWER !!!
Thanks my friend!
ReplyDelete