Thursday, December 22, 2011

Rhal Kutrie: Heavy Particle Battery Rifle Came!

Hey all,
   I haven't really started doing any building on the Rhal Kutrie yet, but I have received the 3D print of the 3D model I made of the rifle.  The heavy particle battery rifle was intended to be a bulky blockish power house particle cannon that will compliment the design of the Rhal Kutrie nicely IMO.  Here is a photomanipulated mock up I did with the rifle being held by a Zaku Cannon I had handy.


  Now to start off with, the rifle isn't perfectly 100% as smooth as it needs to be for a cast, so I will probably end up casting this prototype first, cleaning up the cast from that, and then casting that cast again for a more perfect version that will be sellable.  Here are some more photos of the actual part without manipulation.

Saturday, December 17, 2011

Featured Modeler Decay: A Young Old Pro

Hey all,
  This is gonna be my second featured modeler section, and I've dedicated it to a modeler that I respect greatly, and who has years of experience despite him being in his early 30's; he goes by the handle Decay.  The way this feature is gonna work is first I'm gonna show off some of his pieces, then I'll post a section where he answered a few questions of mine as they pertain to modeling.  You probably recognize him from the forums as an awesome guy who's always willing to grant praise and offer positive suggestions to anyone, and he hails from Germany.  One of the reasons why I wanted to feature him is for his amazing scratchbuilding skills, immaculate clean up and attention to detail, beautiful immersing dioramas, and most important his willingness to always learn something new.  Now as I featured Kamm last post, this post makes sense to make because Decay was Kamm's partner in the build off of the High Grade sazabis.  Decay chose to go about his build a little bit differently, instead focusing on an space type Saz.  His modifications remade the chest, legs, the head, feet, it's all modified to look more rounded and fluid.  He even topped it off with a sweet red and black paint job with pigments for weathering.  Here is Decay's Sazabi Space type:


Thursday, December 1, 2011

Featured Modeler and Our Team Up!

Hey All,
   I'd like to start off by saying (yeah that usually means that what follows is gonna be long winded.  hehe Yup.  Suck it up and keep reading! haha)  that I don't usually do features, or I haven't yet, but I'd like to start doing it, as a way to share my thoughts and such on modelers I find to have amazing potential and talent.  I'm fortunate now because the person that I am going to feature first in my features is none other than Kamm, whom I'm also going to be working with in a workshop we are calling Handeye.  I will go into more detail about our workshop later as we get closer to releasing our resin kits, but for now I will just say that we will both be scratchbuilding and designing models and model accessories, (most of our work is done by hand like sculpting and painting) and then be casting and selling them to those who are interested.  Enough of that for now though, let's move on to Kamm.


   Those of you in the Gundam modeling community forums and from youtube know him by his handle Kamm.  His name is Jonathan Kamminsky and he is based in the UK.  He saves babies from burning buildings and rides man chomping dragons during the day, at night he makes amazing models and is innovating in an area which I find formidable: Hand Painting and weathering.  One thing you should always know about his work is that the majority of what you are seeing is hand painted.  Yes that's right ladies and gentlemen, he even does the base coat by hand.  (he does prime coat and top coat by airbrush, but let's be realistic the base coat is the hard part.)  I know right, where are the brush strokes?  That's the genius.  This guy takes his meticulous time and does a bazillion thinned layers to achieve that smooth airbrush looking finish.  The model I'm featuring from his mecha cabinet is his High Grade Sazabi Groundtype.  You can find his WIP thread here and a sick youtube video showcasing the finished kit HERE.

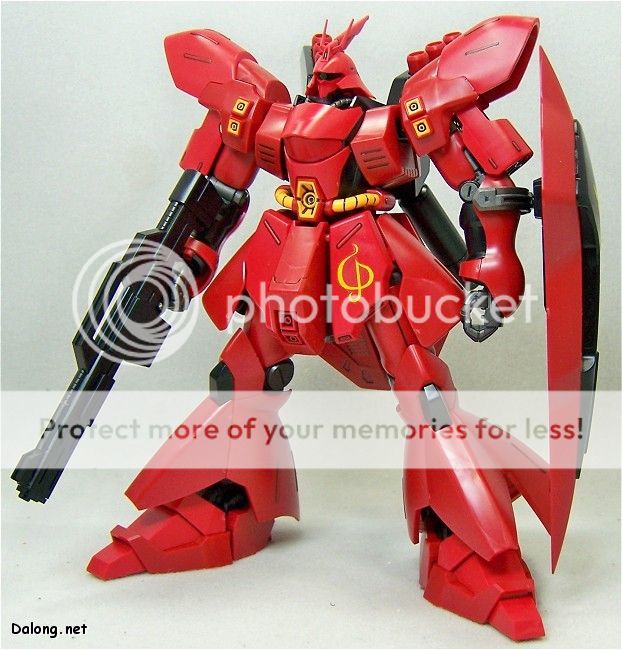
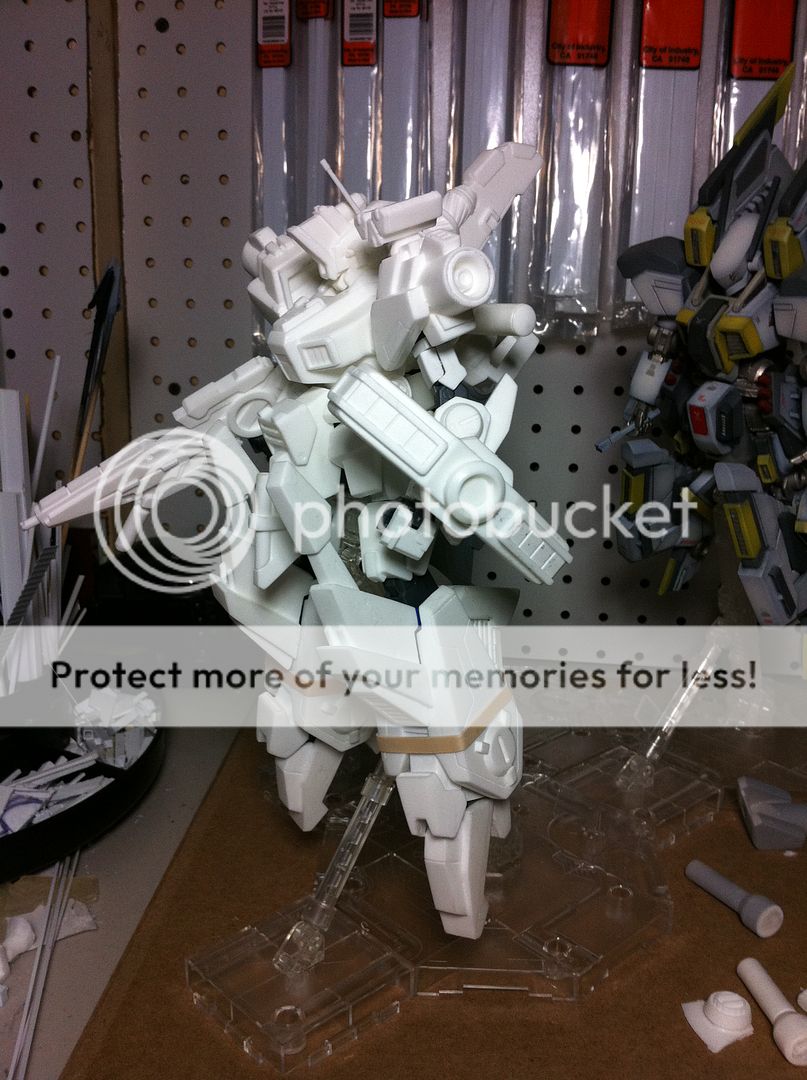
Let's jump into the details.  To begin with you should know, this is NOT a master grade kit.  This kit started as a crappy high grade 1/144 Sazabi kit.  Stock photo below:


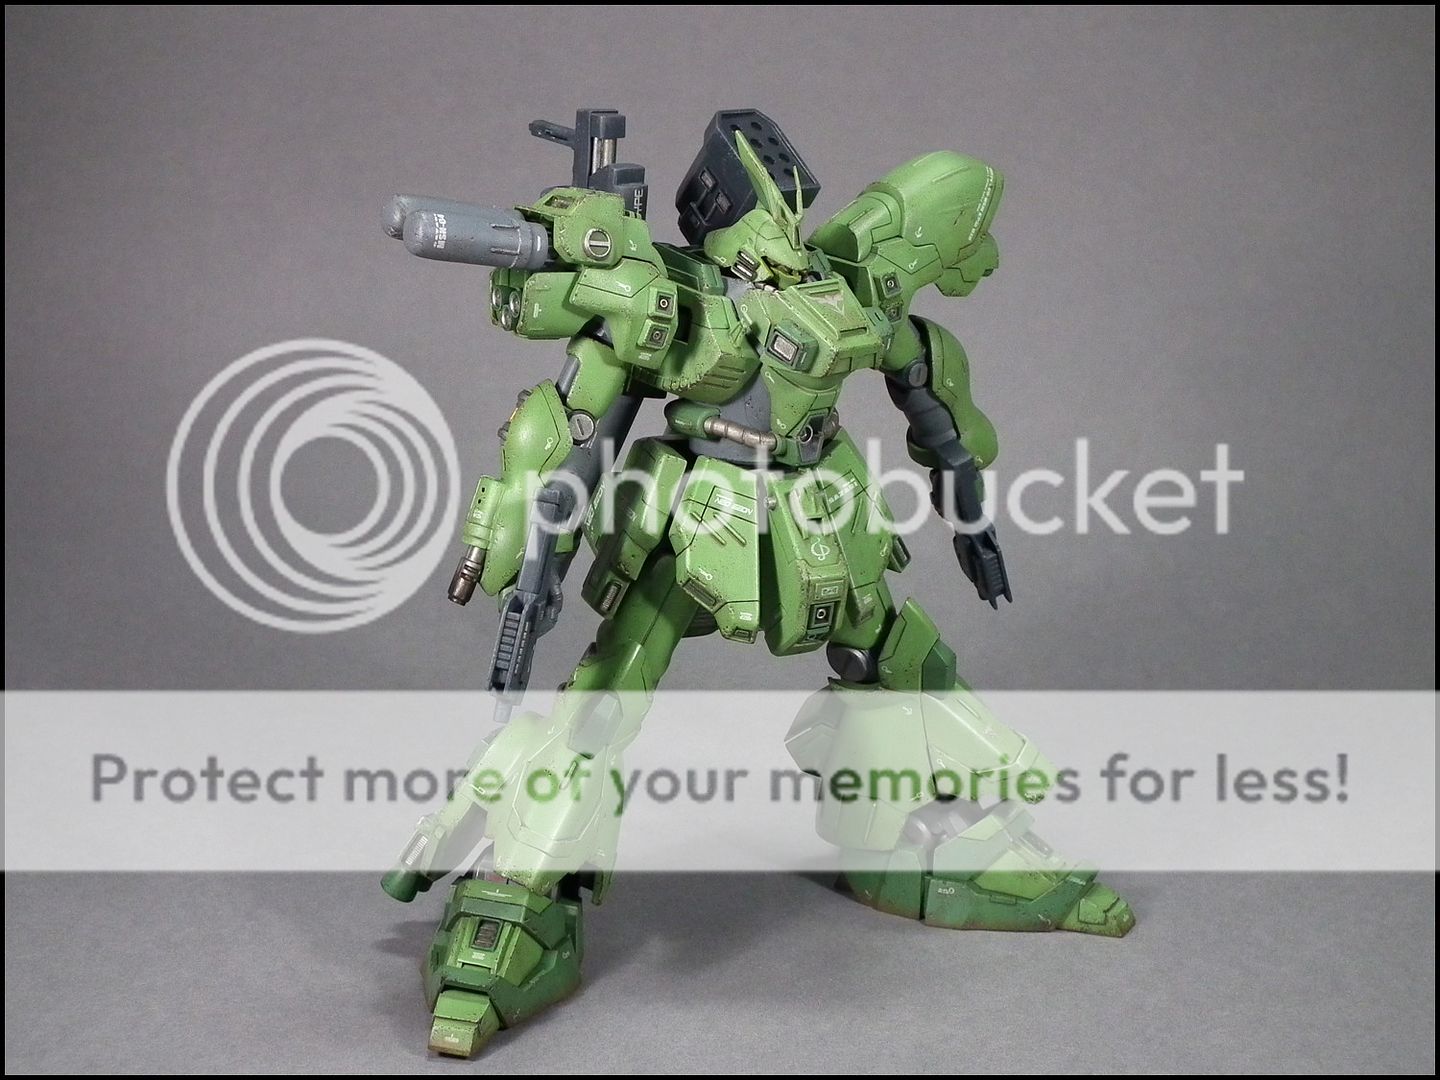
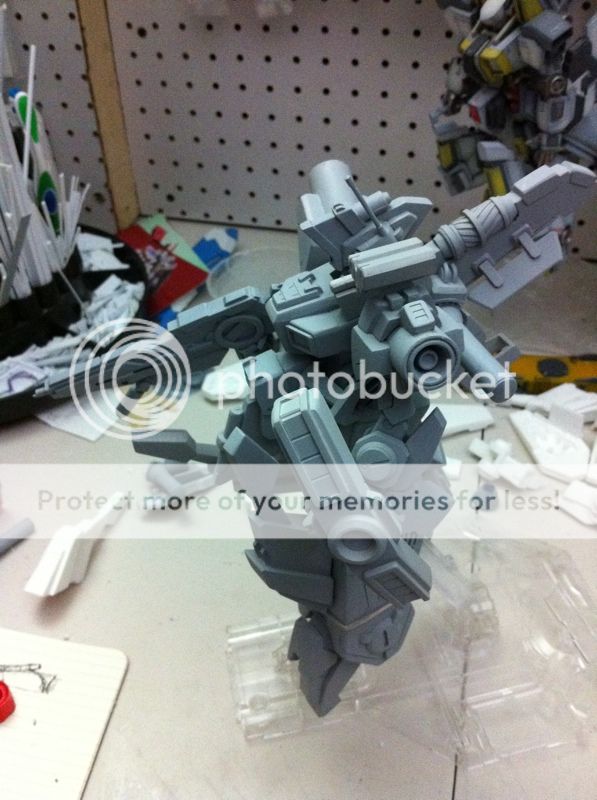
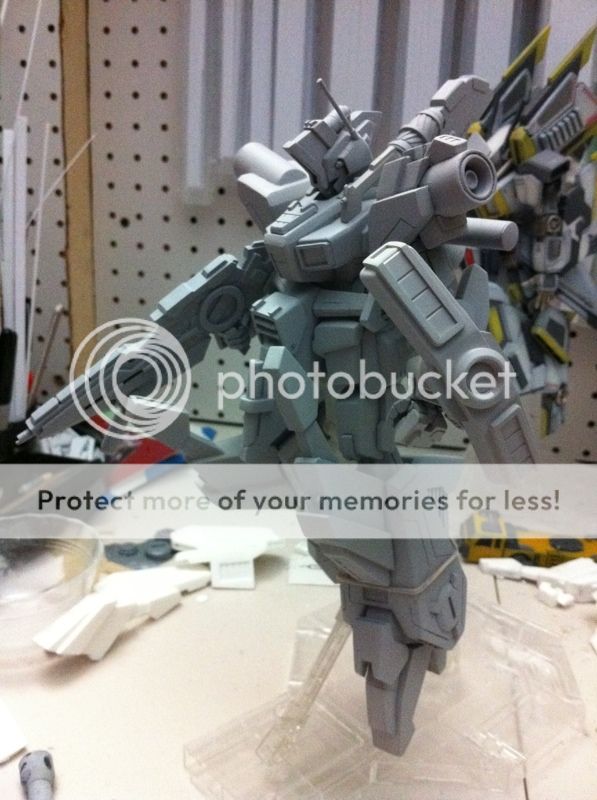
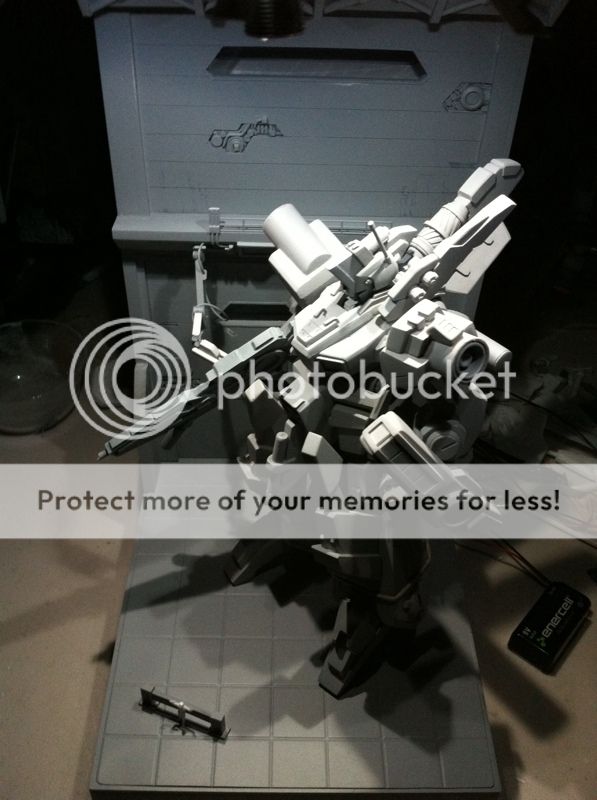
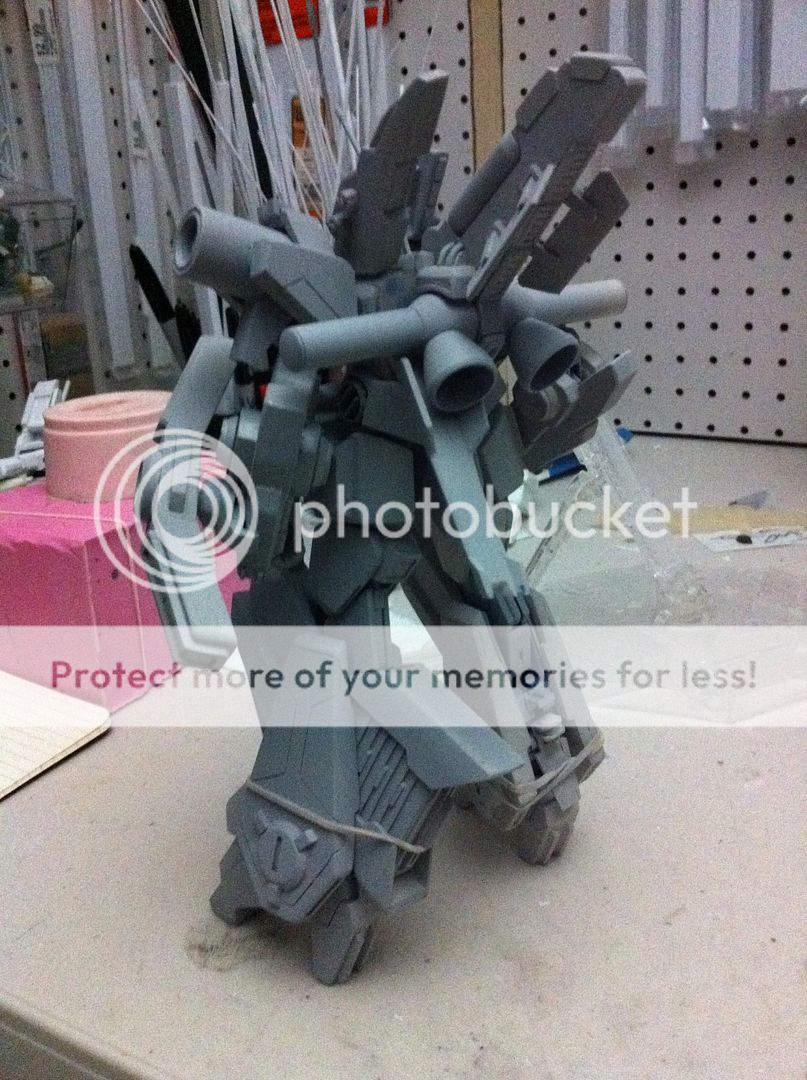
Not the most detailed kit I've ever seen, but Bandai does know how to provide a clean canvas for those with the talent to work on and improve.  Kamm has added a plethora of improvements to the kits that he both scratchbuilt (like most of the lower leg skirts) and kit bashed to make a seamless and interesting model that has original design elements that are both fun to look at and functionally practical.  Let's take a look at the rear of the kit first, as there is a wealth of detail and examples of his building prowess.

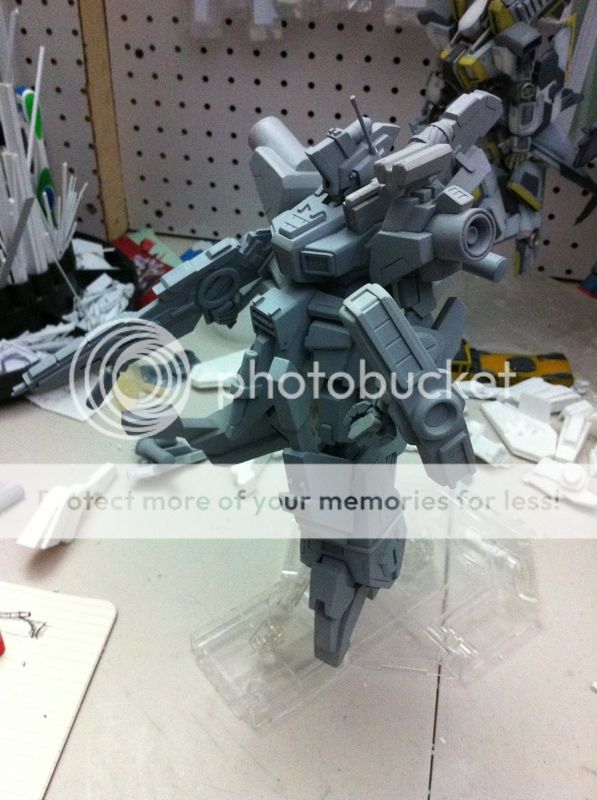
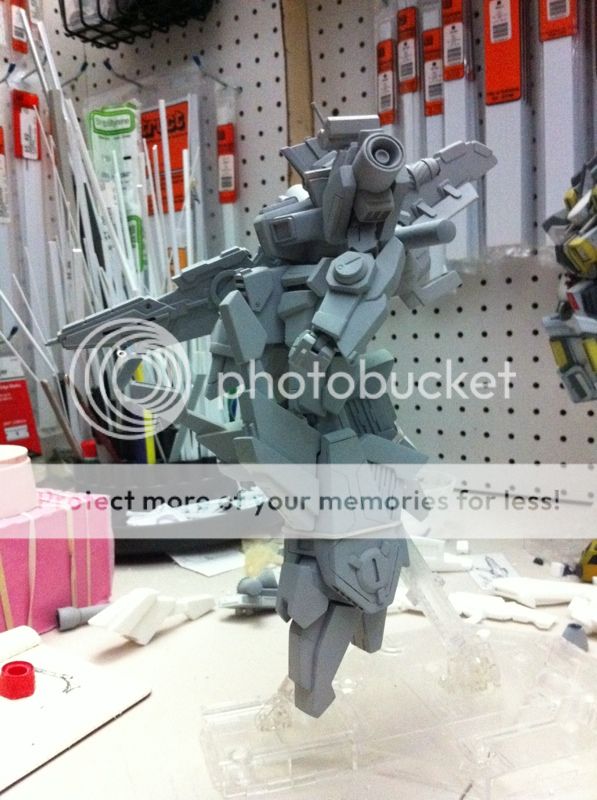
The rear skirts have been modified heavily and he has added a series of thrusters.  The panel lines must have been a nightmare to do as this kit is only a 1/144, but they came out wonderfully.  I really enjoy how the thrusters on the legs seem so functional and they have corresponding intake vents for each thruster.  The kit also has about what I could count as maybe 20 billion decals.  Some appear to be the size of a toothpick head.  Just the shear time involved.........yikes.  Also all his decals are expertly done with no silvering whatsoever.

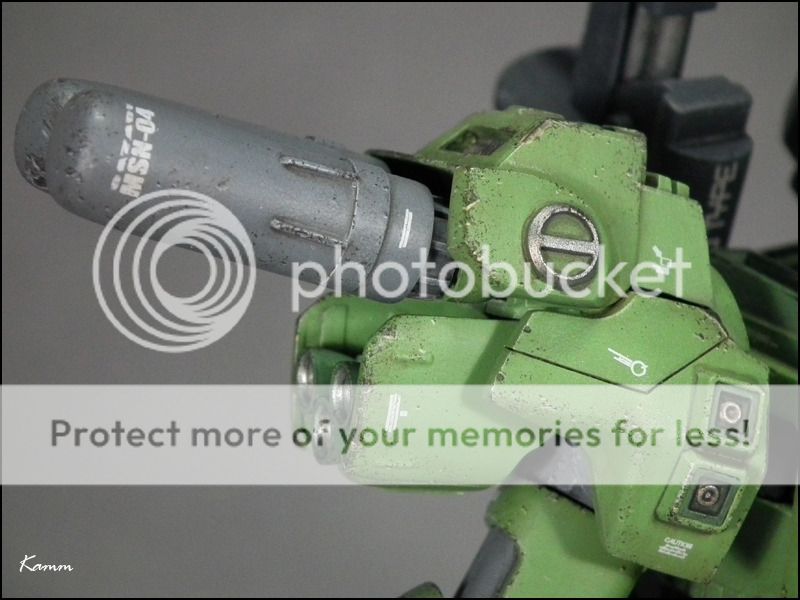
My favorite part of the kit or one of my favorite parts is the shoulder propellant tanks.  He made the decision for somewhat odd placement of them, but I love it so much.  I do like outside the box thinking anyway, but this was perfectly executed in my opinion.  And he did absolutely NO MASKING.  All done by hand.  The paint chipping is all done with just a small brush too.  No salt barrier.  Just a steady hand and attention to detail with a small brush.  This kit's surface is seriously smooth, he just painted the weathering on.


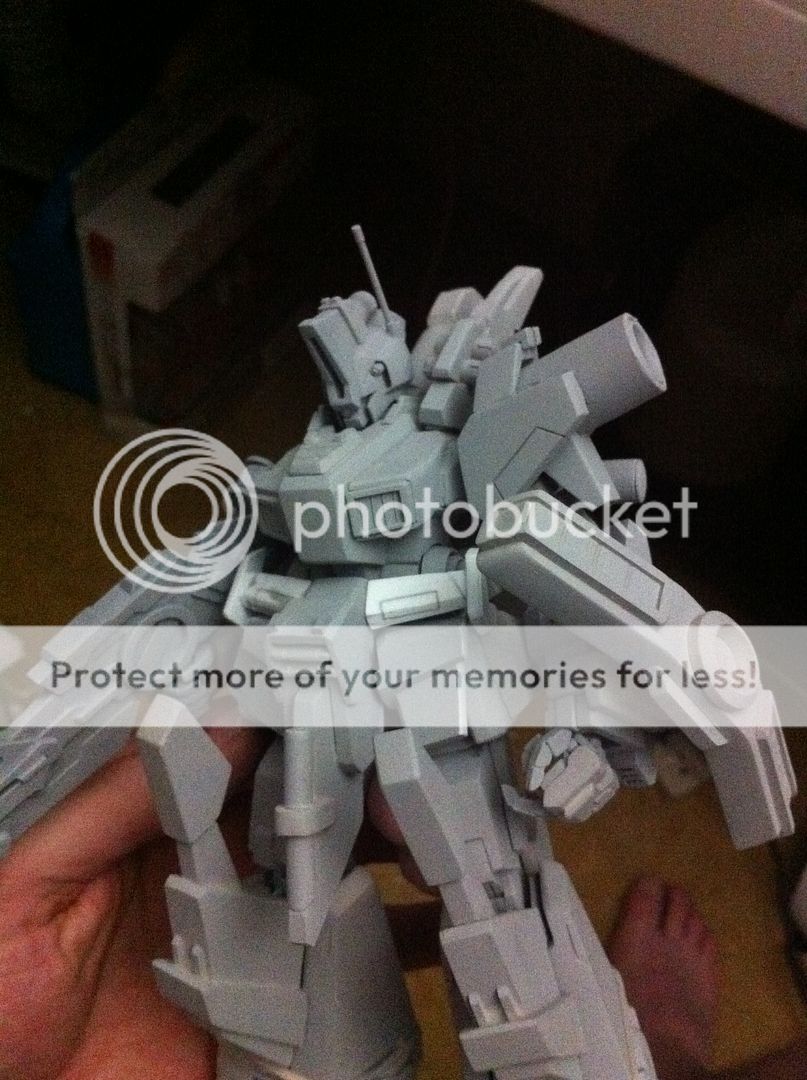
He also painted the face with highlights to look like the mono eye was glowing.  It came out looking so realistic to me I love it.  Here are some more shots just showing off the weaponry:


Check out the details on the chest and head:
Gawd it's like a conversion kit.  One other thing I wanted to note was how all his weathering is to scale.  Remember how this is supposed to be a giant robot a hundred feet tall?  Well most kits we see weathered have huge chunks of rust and chunks taken out of them.  This kit has rust and dings and dents galore, but they are an appropriate size to establish scale.  That was something he did by design and careful planning, and something that I hope doesn't get overlooked.  He spent soo  much time in careful planning on everything from the decal placement to the bazillion little paint chips he added by hand.  (the paint chips even have highlights if you look closely.)

Overall a brilliant piece, and for his second time scratch building anything, and his first time trying out these new mecha modeling paint techniques I'd be surprised if he isn't setting a new trend for scale mecha modeling and painting soon.  Ok I'm done singing his praises but seriously check out his work for yourself and be sure to let him know if you like his work and feel free to comment here, on 
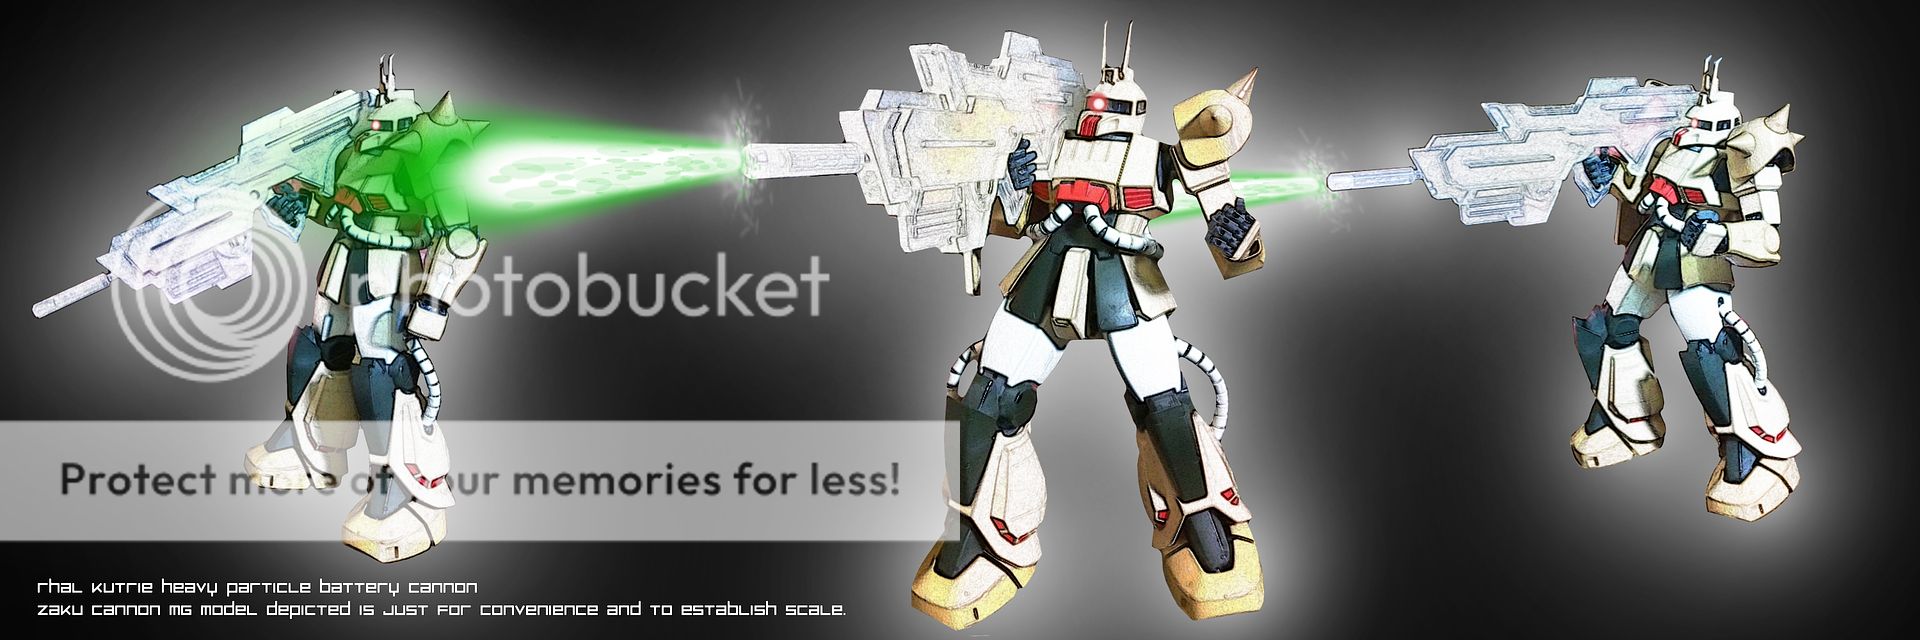
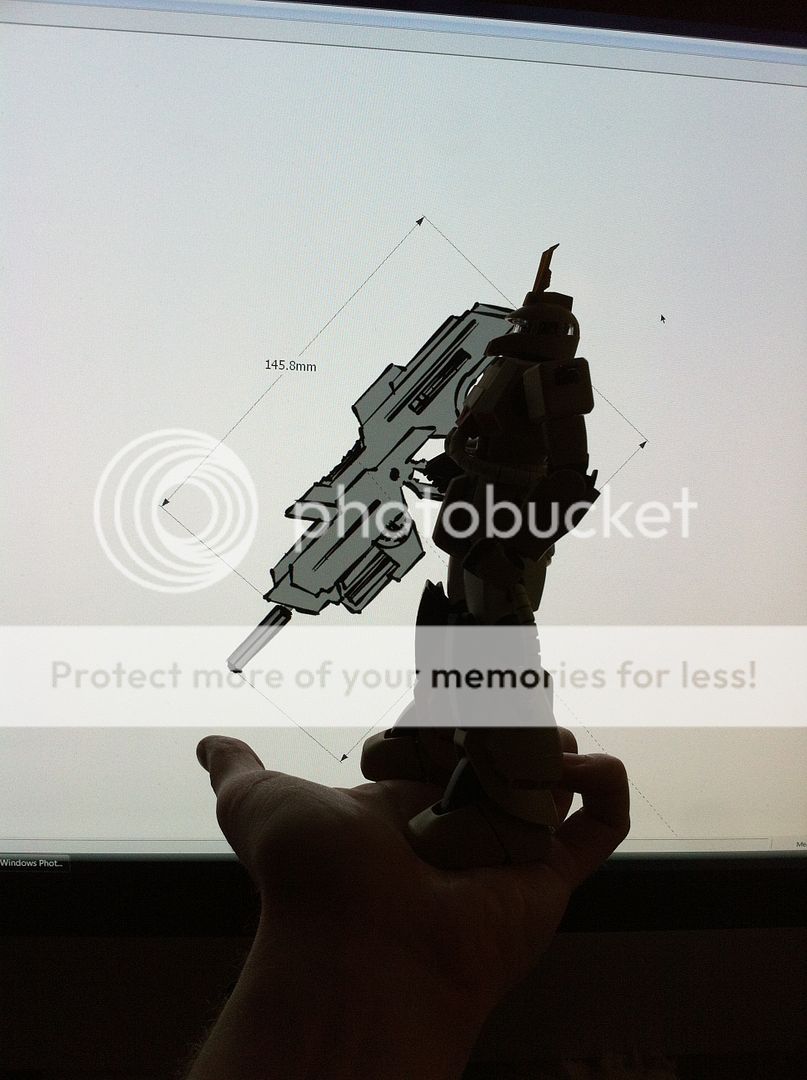
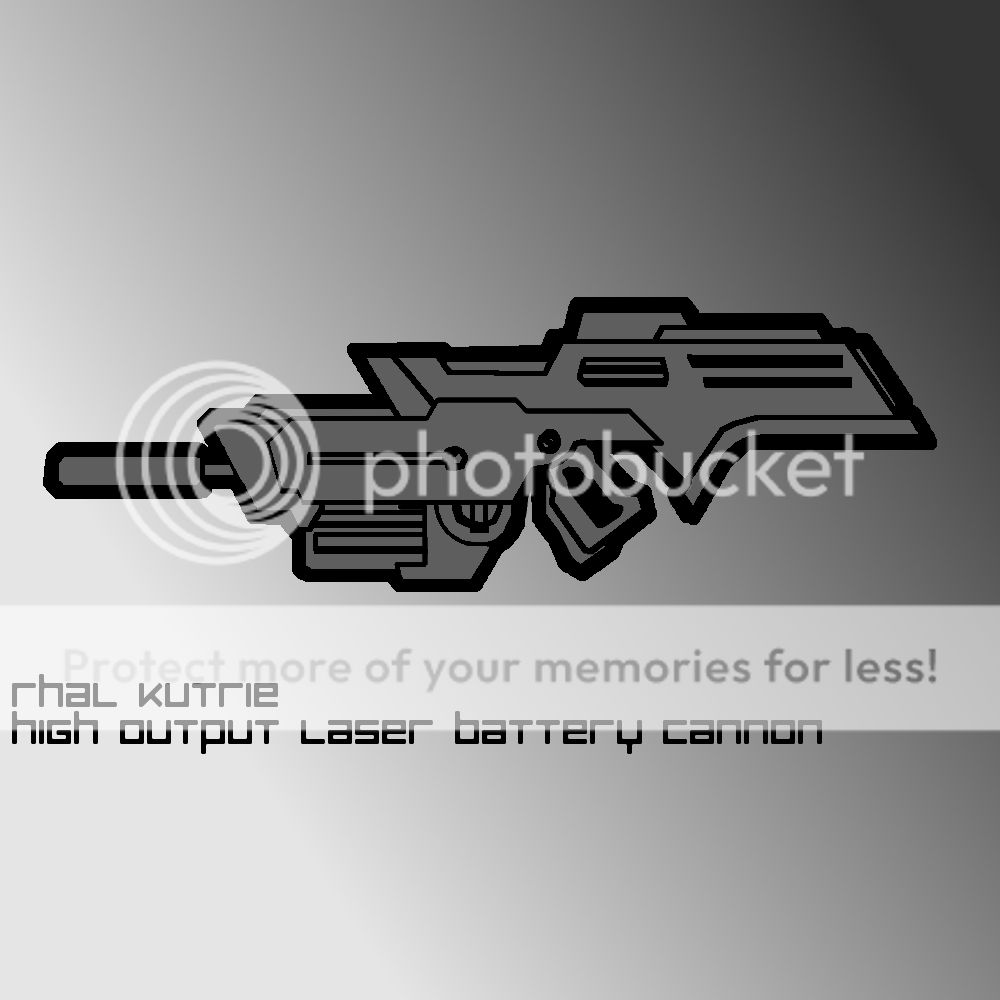
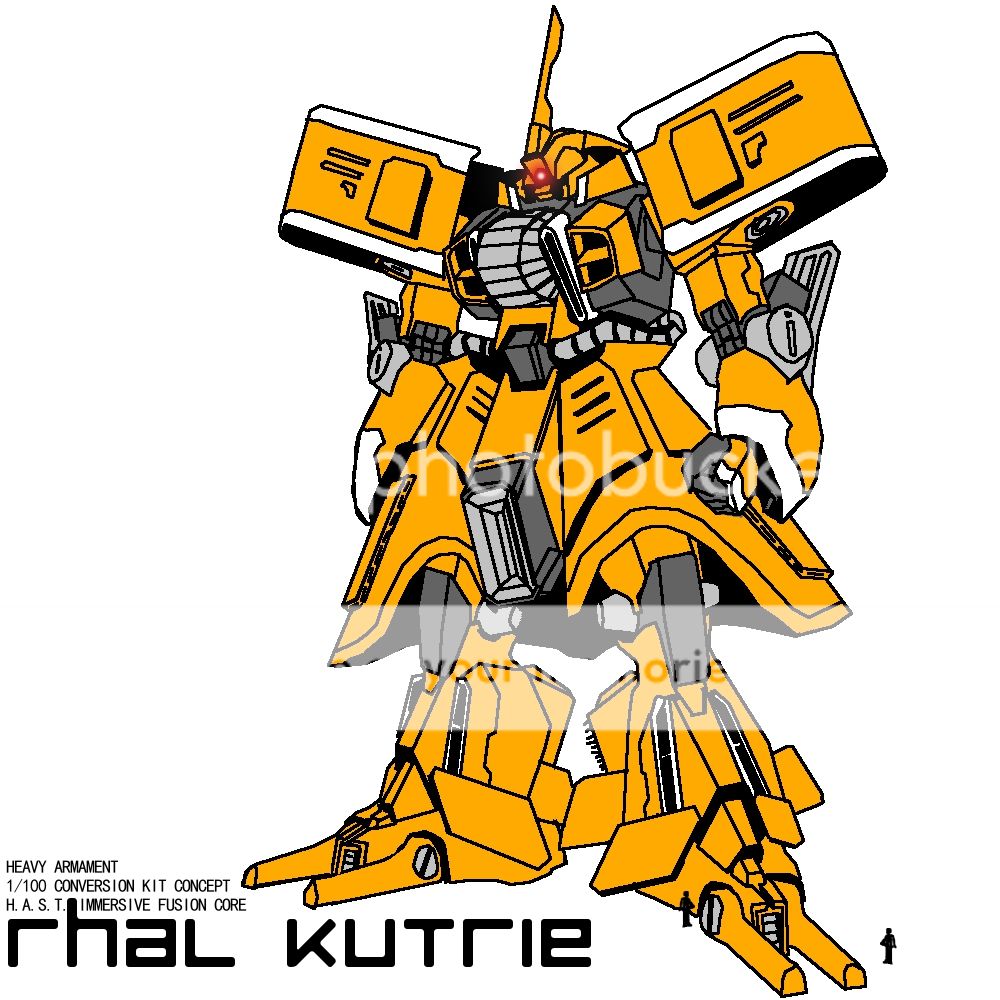
his youtube channel or on any forum you see him.  He's a cool guy and I'm sure he'd appreciate your feedback.  Next post I'll probably be going into more detail on our team up, and our Zaku Group Build project the Rhal Kutrie.  Stay tuned mechaholics.

Tuesday, November 29, 2011

Rhal Kutrie Rifle 3D Print: It's gonna look great methinks

Hey all,
    yesterday I made up my 3d version of my rifle design for the Rhal Kutrie, and I gotta say I'm pretty psyched about it.  I don't think this will count as us starting the build early as I'm not working on it really until I get the print (and it's only the rifle) but either way I'm still excited about it.  I ordered the part to be 3D printed by shapeways.com, for those of you interested in getting some 3d parts printed for cheap they are a good site.  Again it is my design that I created and then made into a simple 3d model (or 2.5d for those of you who are professionals in this field more experienced than myself) and I sent the model to their website and chose a material to have the part printed in.  Here is what the part looks like with neat sketchy line art in sketchup.

  The idea with the clip is that it used plasma cells that are inserted vertically into the igniter shaft which then shoots flaming plasma out into the wide world of destructible mecha.  the clip theoretically would eject by the pivot cylinder which would make the magazine face down like a normal clip and eject that way.  The grip will also look like it pivots, though it will probably be fixed position to make it easier for me to cast, and to improve the detail quality of the piece.  I had to shorten the barrel a hair to make the part fit into the bound box of the printer that uses my chosen material.  I will probably have to cast this gun at least twice, one for the prototype, one for a cleaned up version.  Hopefully that will be all on the casting for the rifle.  I also plan to add more details to the cleaned up version when I am satisfied with the surface quality.  The more details I add in the printing stage though the more headache I will have cleaning it up.  Better to add that stuff later.  Here is the gun to scale on a Zaku Cannon MG:


Saturday, November 26, 2011

2012 Mecha Contest: The perfect way to end the world.

Hey all,
   I just wanted to take a few minutes to fill in anybody who reads this (you select few people you) on the 2012 Mecha Contest that Kamm and Sneeper1980 are hosting on MAC forums.  HERE is the youtube video showing some of the contest sponsors and categories. 

    The contest is looking to be somewhat amazing compared to any modeling contest I've seen, and to be quite honest it's probably gonna be amazing both in the talented people who enter pieces, and the prizes being given to both winners and many just for people entering at all.  Yep that's right, we could win prizes just for entering the contest at all, not to mention prizes being given out for loads of categories and some as judge picks, sponsor picks, and popular vote picks.  There are over 50 prizes being given out, which is better than most contests by multiples, and the prizes are awesome prizes too.  Like PG gundam kits, five star stories full resin kits, some rare kits like the tachikomas from ghost in the shell, and loads more I can't even remember.  You can click HERE for the full page of prizes being given out.  Seriously it's around a full page.  For those of you who love mecha of all kinds, Gundam, FSS, Amored Core, hell any mecha models at all you should not only enter this contest, but get your friends to enter it.  Spread the word mechaholics, and lets have fun.  Can't think of a better way for the world to end.  Stay tuned as well mechaholics, I'll be getting back into the building here soon, and thanks for sticking with the blog.

To enter the contest, read the rules, read the incredibly long list of prizes, or just check out what the fuss is about click HERE

Saturday, November 19, 2011

Rhal Kutrie: Heavy Particle Battery Rifle....but better!

Hey all,
  I have been playing skyrim obsessively for the last week, I think I've maybe played about 75 hours in a week.  So obviously I haven't done much in the way of modeling or sketching.  I did decide to make a line drawing of a sketch I did the other day, and I think it looks much cooler than the crappy one I sketched up before.  It's gonna be a kinda big cannon, and in the image with the Rhal Kutrie in it, the cannon is to scale I believe.  It should look pretty big, as that was the effect I wanted.  I may decide to get this cannon 3d printed, even though I told myself I wouldn't do that again because of all the cleanup required.  I just think I like the idea of it looking exactly like what I sketch up without any distortion.  I just will have to make sure I do a ton of cleanup, and I may have to cast it twice.  The first time just to make sure I still have something to go back to in case I damage it, and the second time just to make a perfect copy. 

Heavy Particle Battery Rifle in the picture is to scale with the mecha, yeah I know it's gonna be kinda big.  Yay!
The ammo clip under the gun is on a pivot so the clip comes down to eject and reload.  I think it will probably just be a battery pack, not actual munitions, despite the shape.  The gun itself won't actually have any moving parts on it as that would just make it much more difficult to cast, but I will make the mechanisms look realistic enough to look functional.  This does fit way better with the heavy armament feel IMO.  Ugggh  I just ate my second lemon poppyseed muffin and I feel icky.  That is all mechoholics, stay tuned for the build soon.

Thursday, November 10, 2011

Rhal Kutrie: Heavy Particle Battery Rifle

Hey all,
  I sketched up a rifle idea today based somewhat loosely on an idea on saw on some random internet photo that looked cool.  Typically on things that inspire me I sought to make my own version of it, and ended up with something totally different but something I like.  Here is my idea of the rifle for the Rhal Kutrie.


I may adjust the sizing of certain parts to suit my mood when I build it, but you get the idea.  Nothing complex goin on really.  I also made a silly hodgepodge of all the sketch ideas so far.  Yep I crammed it all in.  haha.  Looky!


Just letting everyone know, I may disappear tomorrow if all goes well and Skyrim doesn't have any problems like driver issues, or the inability to recognize multiple cores, or any other issues Bethesda should resolve in QA.  So if you don't hear from me and you find my corpse deparately clutching my mouse and keypad with Skyrim on my monitor, don't be surprised.  I was probably killed by a boredom eating virus known as fun. 

Wednesday, November 9, 2011

Zaku Group Build: Rhal Kutrie Backpack Idea

Alright fellow mechanerds,
    I've been thinking on the backpack and peripherals idea, and what Aulon suggested resonated with me, so I drew up a sketch and am deciding to run with it.  Aulon suggested why not have remote controlled shields that connected to the backpack.  Well mate, brilliant idea and I'm gonna add to it.  I remembered looking at the deep striker and that it had a large array that looked like either a shield generator or a ladar jammer.  For my purposes I'm gonna make one similar (in that it will have three large fins on a large disk shaped object) but there will be two of them that launch from the backpack, and are energy shields like on the F-91.  (Or like the Drehksturm Assault Type shield.)  The disks will have bell thrusters that will retract into the backpack, and will be controlled via laser transmission.  The shield idea is basically a large EM field protects the Rhal Kutrie from damage via munitions or lasers that can be disrupted via EM.  Plasma will still melt em though.  (Gotta have some nerd food right?  I would eat it.)  Anyhow here is my goofy line drawing sketch.  I'm sure you probably get the idea.


The large rectangular afterburners are for thrust obviously, and I'm sure I will add a small extra bit of details when I actually make it.  I don't think I'll make the pack huge otherwise, as I really want to show off the idea of the deployable energy shields.  (Aulon gets smarty pants good idea points.  Love ya bro!)  I am really looking forward to this build.  Stay tuned mechaholics.  (Or don't and you won't get nerdfood.)

Again here is also the mech idea that this backpack is going to go on, just in case you missed it.

And here is the sketch I made originally so you can laugh at my art skillz.  haha.

Monday, November 7, 2011

The Zaku Group Build: Rhal Kutrie

Hey All,

  In light of Aulon's Zaku Group Build coming up soon, (Check out the MAC forums for more info Zaku Group Build Thread) I've decided to get into the planning stages of my part of the build.  To start off, the build allows partnerships, so I am working with Kamm, and my part is the sculpt.  Kamm is doing the clean up, painting, and presentation.  Kamm may decide he wants to scratchbuild some for the build, but that is up to him and I will post his work here too if he decides to do that, and if/when he says it's cool to share.  I am going to basically make a conversion kit, as I did for the Drehksturm Assault Type.  This one I am calling the Rhal Kutrie.  Here is my concept, which I made by doing this crappy line are on top of a stock Zaku 2 version 2.0 photo so I know the parts will fit on the frame.

 I have taken inspiration from some of my favorite kits and just made what I think will be a sweet looking Zeon-esque heavy armament type mecha.  The toes on the feet I did pretty much just take from ZLucas Garbaldy (an amazingly beautiful sculpted kit), but the rest of the foot and the rest of the body is pretty much all stuff I just drew out today on my own.  the hip skirts are similar to those on a kit a friend of mine has made, or at least inspired by them.  The cockpit area is supposed to look like it has plated steel that reinforces the cockpit hatch underneath it.  The shoulders have large verniers for lift.  The forearms have heavy cannons with large clips extending out the elbows, most of my designs have guns on the forearms as I think it is a proper use of space.  Also typical to my designs the calves will have large thrusters and intakes on the shins and calves.  The two large white vents on the chest are laser cannons.  I was gonna do away with the cables on the waist but I thought they might be neat to leave, although I may remake them.  I want the weapon to be a huge mega particle cannon, which either Kamm or I will design, and the backpack I will design later will have a large battery pack on it probably.  I'm still thinking that I want the kit to also have some large wing-like structures like the shields on the Kshatriya, but I still haven't figured out how I want to go about that yet.  I will keep everyone up to date as I can.  I can't actually start building until December though, as the contest doesn't start until then.  It's actually fine by me, gives me more time to veg out and play video games.  Skyrim comes out in four days! woot!  Anyway though I will post WIP photos of this as I make it when I actually start the build.  And yes, this kit will also be a kit that I cast and will probably sell the casts once my partners half is done.  Stay tuned mechaholics.  (Again I know that only maybe 2 of you read this but it makes me feel important.  haha)

p.s. here is my silly lil' sketch without the shadows n such:

Sunday, October 23, 2011

OK, so I'm not dead


Hey any and all who may follow me,
   Lately I've been absent from posting in the forums or on my blog, and I just wanted to let you guys/gals know that I'm not dead, and I haven't quit the hobby.  I've been working on a project that I can't share yet for reasons I will share when I share the kit itself.  Wow could I have said share again?  Ooops I did.  Anyway the Drehksturm Assault Type kits are still on schedule, in fact my partner in this endeavor has received the first cast, and will be ready to start on it soon.  I will announce more details on it and the partnership when I can.  (I hope I haven't said too much already) I don't want to ruin the surprise.  haha As if there are hundreds of people waiting with bated breath!  Imagine me an egomaniac, (he makes one kit and his head explodes) oh well.  But as soon as I can share the partnership officially and the secret project I will.  But just as a small bit of insight I will say you may be seeing this logo (above) in the future.  Stay tuned mechaholics!

Monday, September 12, 2011

Drehksturm WIP Part XIV

Today I have settled down for the loooong week of pouring plastic.  All the molds are made, so now I just have to clean the excess mold release out by making shit pours, then I can make the good casts.  (Basically when I make a mold the first three resin pourings after the mold is done will be tacky because of the amount of mold release I use to make the mold.)  So here is my dummy cast, or the first cast I've made showing all the good casted parts I've made so far.

Monday, September 5, 2011

Drehksturm WIP Part XVIII

Casting, casting, casting..........so far I have been making good progress.  Oh and before I continue I want to give a heartfelt shout out to my Dad for giving me the pressure pot that makes all this possible.  THANKS DAD FOR THE PRESSURE POT ONE OF THE MOST USEFUL TOOLS I USE! I now have a mountain of molds and more on the way!  Keep in mind that each half of a mold takes 24 hours to cure so I think I'm making good time.  Also all the molds for the entire Assault Type conversion will be done probably in two or three days.  So after that I will just be amassing parts for the boxed kits.  Oh and in case I failed to mention it I am making two different types of kits for the conversion, the Assault Type, which is what I'm molding now which has missiles and guns and a short afterburner for quick burst thrusts and military assaults.  The Recon Type I will be working on after this one is done will be geared for espionage and recon work.  It will have longer thrusters and more cloaking gear like LADAR jammers and Radar jammers, proximity mines, long burn thruster and long swallow tail like deflectors, and custom intakes on the torso to look more elegant and to muffle noise and static generated by the reactor and components.  Long story short, two types one is almost finished, one is still being worked on.  Here are the mold for the Assault Type so far:


Thursday, August 18, 2011

Drehksturm WIP Part XVII and 1/2

I'm going to keep this short as I didn't really do much today, I just did a mock up of what the Assault Type Drehksturm is going to look like completed.  I haven't decided on a color scheme for mine yet, although I plan on making three.  Here is the line drawing of it.


Wednesday, August 17, 2011

Drehksturm WIP Part XVII

I made some more parts in the last couple days to give the Assault Type some more power, including an optional dual missile bay with beam sword attachment (to be used instead of the machine gun collar if one chooses), a smaller more skeletal looking short burst afterburner, and a Triple Cluster Bomb Pod to be mounted on the shoulder armor.  Here are some shots:

Monday, August 15, 2011

Drehksturm WIP Part XVI

Today I worked on three things, the shoulder paudron underside, the chest, and the collar option part.  The shoulder pauldron part is just a thrust vent I added to give shape and provide function and lift.  The chest part I just added a thin layer of plastic to provide depth.  The collar option part is just a part I liked that I couldn't decide on between it and the other so I decided to make two different options for the kit.  The part with the grenades and thruster on it are for the Recon Stealth Type, and the one with the heavy machine gun is the Assault Type.  The Assault Type will also be getting a couple of other option parts like a different shape and type of thruster bell, and maybe a missile launcher if I decide on it.  Here are some comparison shots between the Recon Stealth Type and The Assault Type


Recon Stealth Type:

Assault Type:

Thursday, August 11, 2011

Drehksturm WIP Part XV


Hey all,  tonight I decided to work on the little armor part above the foot.  It wasn't an extensive make, but I widened it some, added some shape to it, and added a vent on the top part facing the shin.  I think it adds to the design overall.  I may still add some detail later on, but for now I am pleased.  Now I gotta warn you I took over 20 photos.  PHOTOS!


Drehksturm WIP Part XIV

Yesterday I decided that the afterburners would benefit from a bit of detailing also, so I thought to add some more gear teeth to make it look like they rotate.  It would make sense that the afterburners could rotate to allow the mech to change trajectory so I made it look like the cylinder had teeth on it and the mechanism above it would turn it via gear drive.  The way I made the gear teeth is I cut out a strip of plastic in a thin long rectangle, then I shaved down a long rectangular rod into something like a triangle, then cut it in short little cuts to match the thin width of the plastic sheet.  Then glue them down in the spacing you like and then wrap the plastic sheet onto the part and glue it.  Now prepare for death by photos!


Monday, August 8, 2011

Drehksturm WIP Part XIII


I really need to go to sleep now.  I have been sleep starved for about 5 days now and I'm beat.  It was worth it though.  hehe.  Tonight I realized I need to replace my respirator, good thing I was only out priming for a short time period with the door open and fans on.  Precautions are always nice.  My moisture trap for my airbrush broke today too which is a bummer, but as things usually balance each other out my casts today were near perfect, and I made the gear teeth on the turbine on the stabilizer.  I am needless to say pleased.  Here is a buttload of photos from my build, be warned there are a lot.  PHOTOS!

Sunday, August 7, 2011

Drehksturm WIP Part XII

 My update for today is short (photo wise) as I worked and I gotta work tomorrow so not much time, but in between naps I managed to do the first pouring of the calve thruster and it came out perfect!  Well the surface it tacky but I did an experiment and poured another older mold next to it with the same resin in the same conditions at the same time with the same batch of mixed resin and that part came out dry and cured so the problem causing the cure inhibition has to be in the mold I just made.  I think the problem is the excess amount of mold release I used in making the mold to keep the silicone from sticking to the master and to itself.  (or it could just be the silicone isn't completely finished curing yet.  I dunno.)  I did wash the mold out with soapy water though and I will try casting again tomorrow to get a non sticky part.  The good news is that he mold fills in perfectly and makes a wonderful part.  The stickiness is an issue I've been working through and I thought I was done with, but it was hard to pinpoint the issue deductively as multiple factors vary everyday I cast, but I'm really thinking the excess mold release is the issue.  I will fill you guys in on that as i progress.  (I'm really thinking that's it though as with my test I poured the same resin into two molds at the same time in the same pressure pot for the same cure duration and they were roughly the same size, so the only variable is the mold or whatever is on the surface of the mold i.e. mold release.  the other mold didn't have mold release on it.)

Wow that was a bit longer than I wanted.  Well here is my plan for adding slanted gear teeth to the stablizer turbine.


Thursday, August 4, 2011

Drehksturm WIP Part XI

Today I decided to focus on the shoulder pauldron.  Since the prototype part I've been working on is in some parts made of vinyl, it's a bit difficult to sand it down, so I made a spare one made of resin.  But since the spare came out pretty good and wasn't too horrible on the surface quality, I decided that the prototype I had been using was fine to use for the casting for the final product.  Long story short I am still gonna use the vinyl containing part to make the master.  Anyway since I now had an extra shoulder pauldron I decided to use it for the photos so you can get a rough idea of how it will look in the finality of the project, except that the final casts will look like the more detailed shoulder but on both sides.  Le sigh.  Finality...sounds so.. final.  harumph. 

Saturday, July 30, 2011

Drehksturm WIP Part X

I'm gonna keep this kinda short tonight, as I gotta work in a few hours and I'm beat.  I decided to make the skirts a little different and added end caps to the upper parts.  I think it flows and adds a lot to that area.  The parts I did today are the white ones.  I'm sleepy.  Photos!