Tuesday, October 16, 2012

10/17/12 Lanzegeist Casting Update

Hey All,
  Just a quick update tonight showing the parts we have poured so far!


I'm gonna need another table to cover with parts!  (And then three more haha.)  I'll probably start on the instruction manual soon.  (Although I need my Wife's big smarty brain to help me figure out the layout haha.)  There are so many parts (yeah I know not compared to most kits haha), about 155+ not including screws and nuts and such.  Just keeping you guys updated on the progress, don't want ya thinking I'm just bummin about.  Wifey and I are working on the castings twice a night and her help is invaluable and allows us to make great parts stress free, and much faster.  I hope you all are as excited about this as I am!

On a side note I will be putting together a SB Tutorial soon when I have a good day to do so, just going over some basics and the tools you need to do them for any aspiring scratch builders or mecha sculptors that may want some help.  (I'm not qualifying myself as expert, advanced, or super skilled, but simply answering a request made by a bunch of cool people asking for a tutorial.)

Stay tuned mechaholics...

Friday, October 12, 2012

Crowned King ..uh...Crown Update!

Hey All,
   As the wife and I are pluggin along at making casts  I decided to fiddle with the head crest a bit more tonight.  And although I wasn't gonna add anymore prongs to it (Gary had said it looked to have enough in that department and I kinda agreed) I did it anyway cuz after the shape being cut down a hair I thought there was too much empty space above the crest.  I also added a long range targeting camera which will have one of my new clear lenses in it.  The crest is gonna be cast in at least four or five pieces so I can even cast it, and hopefully then it will work.  I may add a little more detail and shave down some more, maybe not.  Either way though here is what I did tonight.  Again these parts are just fun optional parts and won't affect the kits if you guys don't wanna put the parts on, they are just extra.  (Except for the crotch/tailfin heavy armor sleeve for the white kits)

I like the new targeting camera a lot.
I added the extra normal camera/eyes also as per my little sketch plan.
I thought it would be cool to have a face within a face.
Forgive the pouring sprues still being attached, I just grabbed a couple of fresh casts for the chest parts.
I'll have a better idea of if this stuff looks cool once it's cast.  Right now the mottling of color throws it off.

Thursday, October 11, 2012

LG Crowned King Armor pack and Casting Update

Hey all,
   I recently had an issue with one of the molds where a piece of the mold rubber just broke off.  The part was the crotch/tailfin armor and that mold was a pain to make.  So I had a little soul searching to do to decide how to proceed.  I basically just decided to remake the mold as it was, and the molds for a few other parts where the mold was getting worn out for some reason or another.  This is what I spent the last weekend doing with wifey between other things.  The problem came in on Monday night when I went to separate the molds.  They had sealed together.  It turns out that I had used Mann Ease release 300 mold release instead of 200, and the silicone had basically just cured to itself right through the release, since the 300 isn't made for releasing rubber from rubber.  After I had a major rage spell, I tried to cut the parts out of the molds.  I ended up snapping the prototype for the crotch armor altogether.  I really only needed to still make the casts for the white versions of the kit with this mold, but still now no mold, no parts.  Well I came up with a solution that I liked so I went with it.  The Crowned King Armor pack.  The deal is that the white casts of the kit are going to come with a few extra add ons that have a little bit heavier armor than the gray casts.  This solution allowed me to make a new crotch armor piece with a little bit thicker plating for the armor, and to make a few new neat extra parts that will basically just be a neat difference between the gray and white casts.  Here are the basics parts of the Armor Pack.

-New optional head crest
-New optional bicep armor
-New optional front skirt armor
-New optional Hulkatr Cannon weight block
-New optional lower leg armor
-for the white kits a mandatory different heavy armor tailfin cover

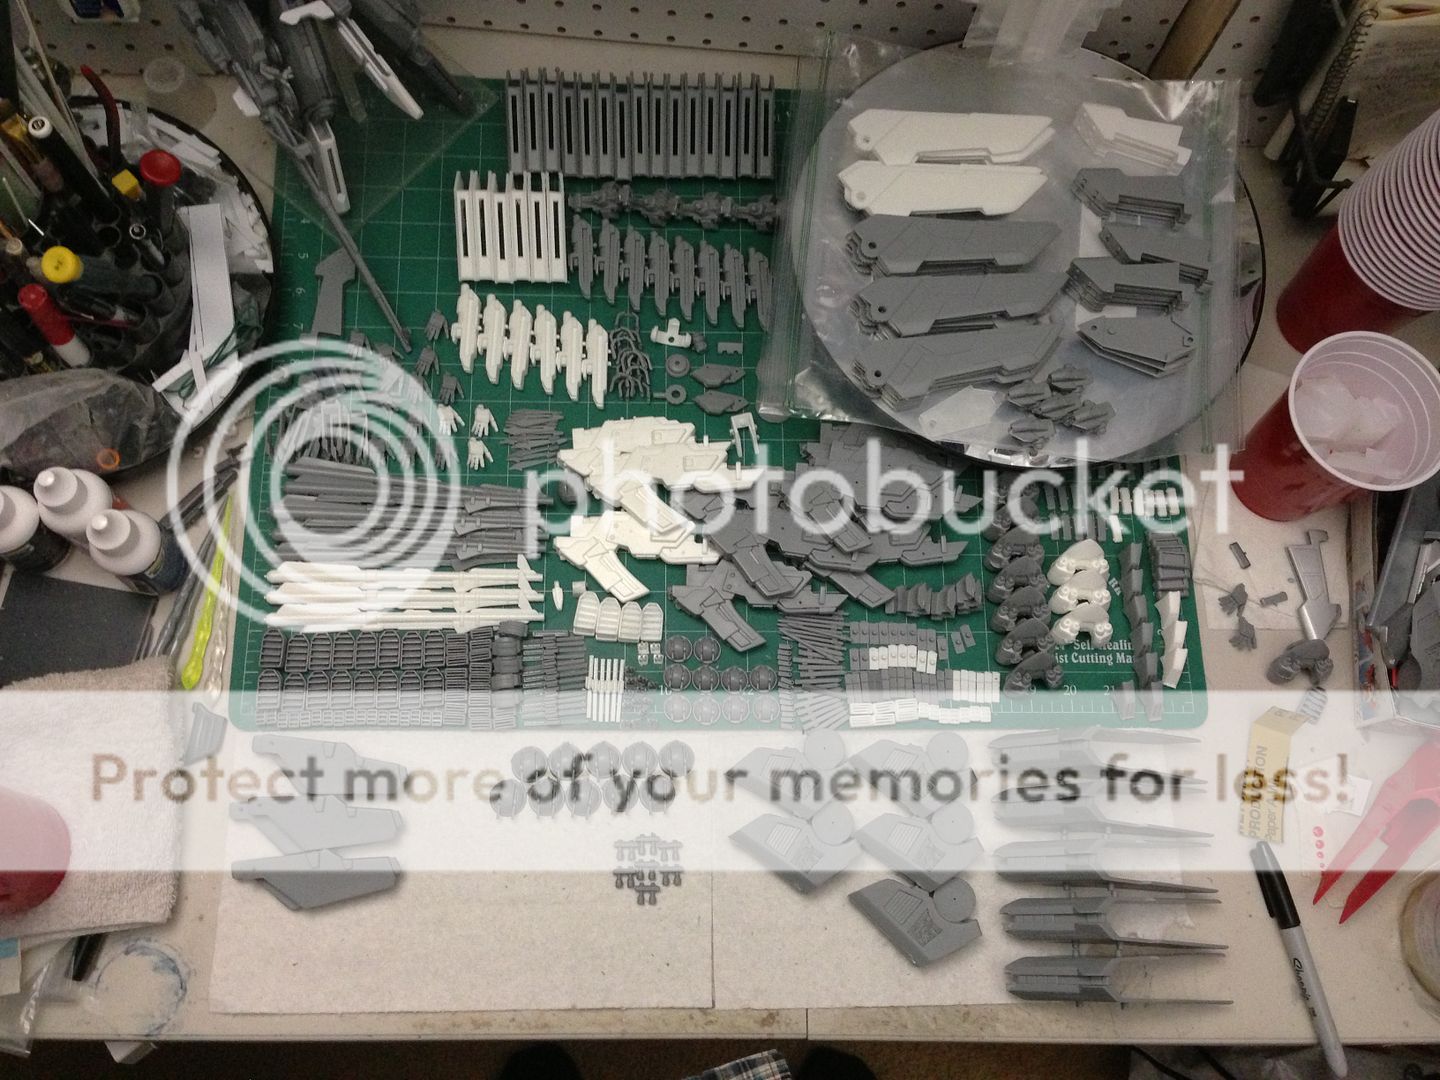
Also here is my casting update photo keeping in mind that I'm two and a half weekend (more casting on weekend days) days behind schedule:


Friday, October 5, 2012

Lanzegeist Casting Update!

Hey all,
   I just wanted to do an update showing my progress with the kit casting.  Here is a photo of the parts that the wife and I have poured so far.

What we are doing is basically pouring the entire quantity that we need for each part to make 10 kits, and then moving on to the next set of parts.  It seems to be the most efficient way.  Like I said I am going to be casting 10 copies of the kit before we move, and so far I have to say 8 of them are reserved.  If you have let me know that you want one I appreciate it, but you may want to do so again so I know for sure.  If the number of kits requested is above 10 I may make a few exceptions up to maybe 12-14, but no promises as I do have time constraints and such.  So again if you want a kit cast, make sure to either comment below or better yet email me at onecoldnight@yahoo.com and use the subject header "lanzegeist kit".  That way I'll know to add you to my list and make sure yours is reserved.

Here is a video update showing basically what you see above, but with the moving pictures of a cinematograph!


Video link in case video is not embedded correctly:  Lanzegeist Casting Update Video!


Tuesday, October 2, 2012

Good news and bad news

Hey all,
    I guess the blog title sounds a bit more ominous than it really is, but it's been a day of mixed things.  I had planned to print out the drekky instruction manual and finish up the packing for sending out, but that was before our male ferret started having seizures and had to be put down.  It's been a rough year for relatives passing away.  Le sigh.  And the not necessarily comparable but still downer problem I was having with a particular mold today just compounded my already kinda crappy day.  (I have a particular mold where the surface of the mold keeps getting a weird matte surface quality to a part that is usually pretty glossy, the parts are still good but it just makes it look like there is a surface quality flaw and I don't know why it's happening.)  So today I just haven't really felt much in the mood to do anything productive. 

  I did, however decide that it would be a good day to maybe start rounding up the cured lenses and toy with them for a few minutes.

I'm pleased that a good portion of the lenses came out wonderful.  Some were oddly shaped or distorted and gotta be tossed out, but most were good.

I took one of my old kits that I modified a little bit when I was first learning to model (an old crappish kampfer mod I did) and cemented on a little bit oversized pink lens.  I used pink as in the animations usually the mono eyed mobile suits have pink eyes when the suit is on.  I used a slightly oversized eye because it catches the light a little better and shows off the clarity.  The smaller better sized version is harder to photograph well, but I do have plenty of those too.  I think I'm gonna use these for my SMS Kampfer conversion kit I'm gonna build soon.  Anyhow here are some eye lens photos.

DISCLAIMER: The work and paint on this kampfer head is old and I just grabbed it to test out the mono eye lens, it's not my current work.