Hey all,
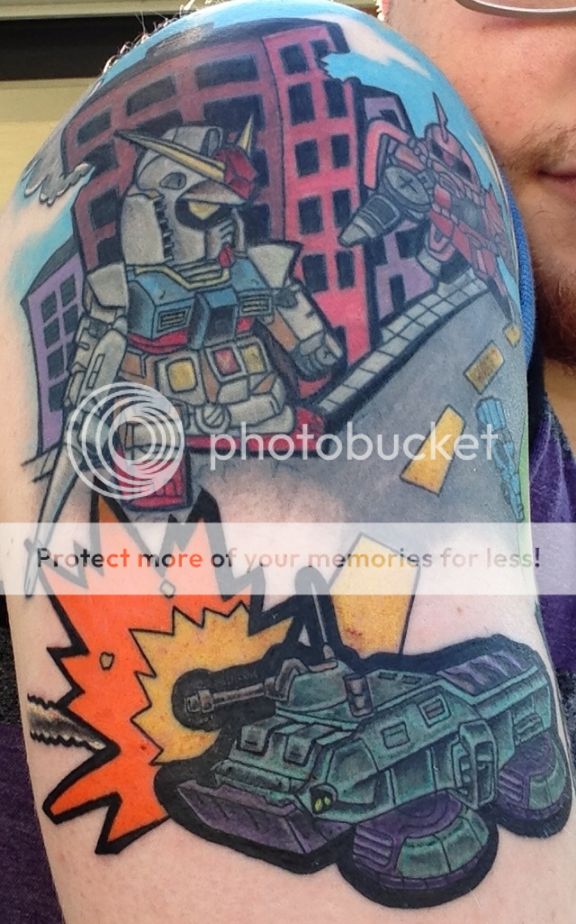
Just a brief update. I recently got a touch up on the previous work done and added a hover truck getting hit by a missile to the mix. This part brings a ton of really beautiful color to it like the vivid orange of the explosion and the seafoam green and purples of the hover truck. Terry did a great job on the shading and the thick outlines are looking awesome so far. Not sure if I will thicken the other outlines on my arm already or just keep them different sizes like a weird stylized cartoon. Either way here is the most recent addition.
In other news I have started doing an action figure sculpt with the intent to cast it. I'm calling it the "Fleischer Truppe" or what I think is roughly Butcher Squad in German. I have some preliminary sketches done up and I bought some sculpey and some more tools to get started. I have the rifle, the helmet, the leg armor, and the chest armor planned, but that's it so far. I've sculpted most of the right hand so far too. hehe. I'm going to make it full articulated and ball jointed where I can.
I'm still waiting to buy a few strip fluorescent lights for the garage to finish painting my box art for the Lanzegeist which I still have every intention of selling 10. Sorry for the long delay getting back into modeling friends, I'm just still getting adjusted after moving twice. It won't be long now.
Stay tuned mechaholics...
Wednesday, July 24, 2013
Tuesday, June 25, 2013
SD Gundam Tattoo Part Deux
![]() | ||
| Current (forgive any distortion in the photo, it's a pain in the ass to take a picture of your own shoulder.) |
Hey All,
This past weekend I had a couple sessions with Terry Peek, the artist who's been working on my SD gundam piece, and he made the progress I was hoping for. If you recall from my last post my shoulder was lookin a bit rough from the first bit of work, but now that it had healed up nice and he was back in town, we got to work on it and get the piece closer to what I want. Now keep in mind that he is still going to do more work on it such as refilling the windows in the buildings, and doing touch ups on color fills and black, adding thicker lines here and there, but I must say I'm really happy with how this is turning out. I still haven't decided if I want to thicken up the outer outline of the Char's Zaku II yet, but I will make up my mind before my next session. Oh and I also got a new addition to the work, a cute lil Ball!
![]() |
| Ball! |
Stay tuned mechaholics...
Monday, May 13, 2013
SD Gundam Tattoo
Hey All,
Still don't have my workshop setup yet, but in the mean time I've gotten a sweet 1/4 sleeve tattoo started (and almost done) showing a SD RX-78-2 and a SD Char's Zaku II fighting in a cartoony city.
A tattoo artist name Terry Peek has been working on it for me. He lives
Still don't have my workshop setup yet, but in the mean time I've gotten a sweet 1/4 sleeve tattoo started (and almost done) showing a SD RX-78-2 and a SD Char's Zaku II fighting in a cartoony city.
![]() |
| Current |
![]() |
| The outlines will be done next session. |
A tattoo artist name Terry Peek has been working on it for me. He lives
Wednesday, May 1, 2013
Papercraft Metal Gear Rex.....P.S. I'm not dead!
Hey All,
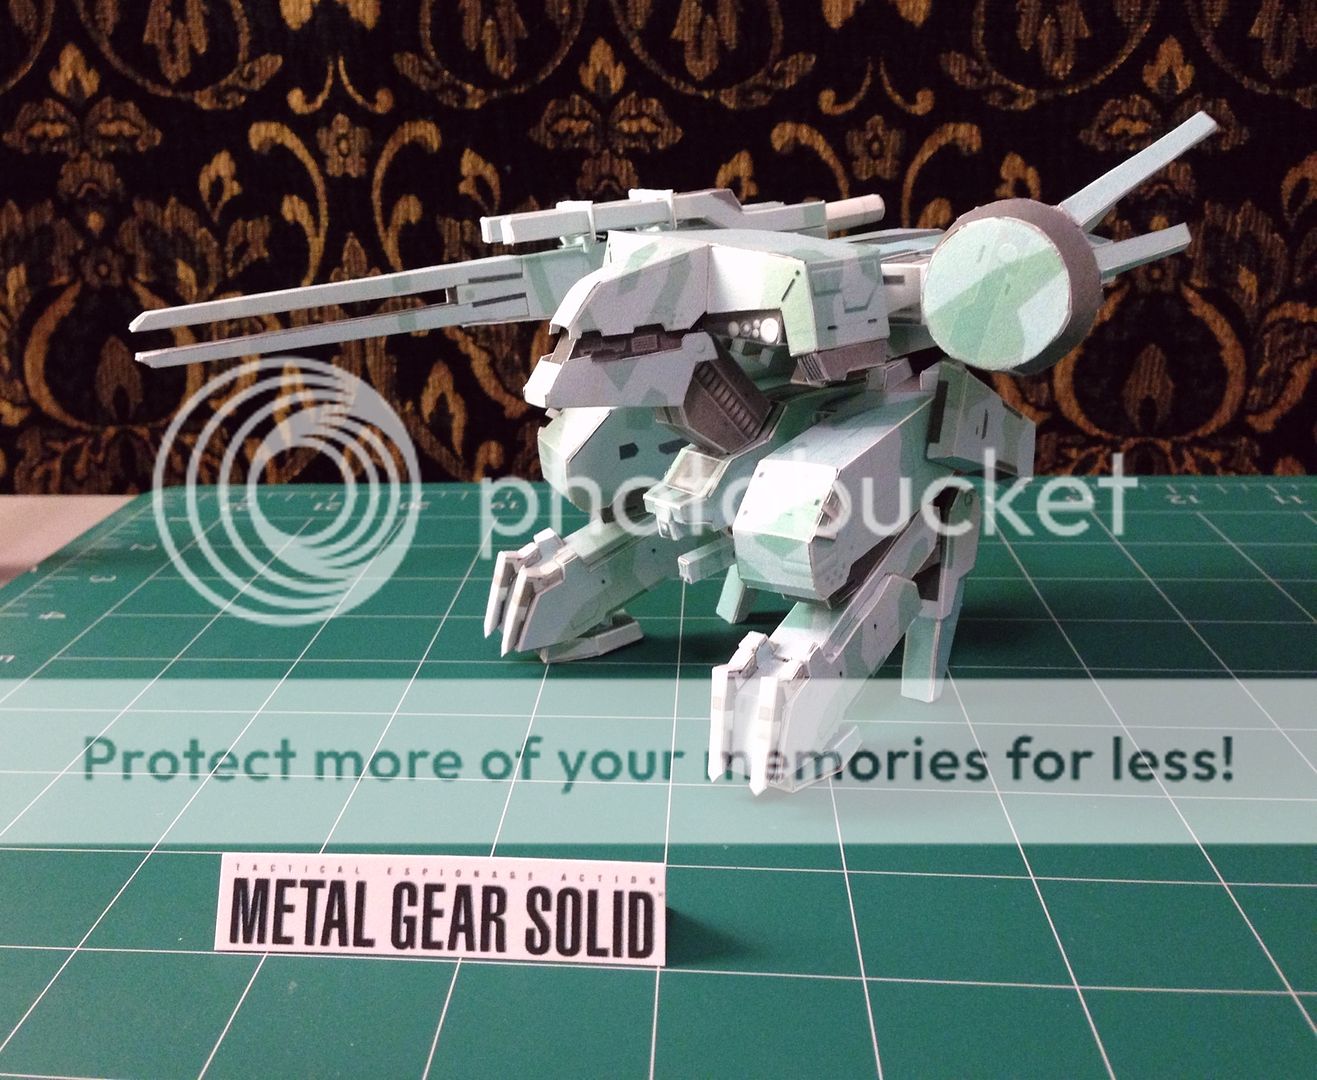
I'm not dead, I just haven't had a chance to unpack all my modeling stuffs yet. And yes for any of you that want it I will still make a tutorial on scratch building once I get my stuff all set up and I've practiced a bit again. I'm just waiting on some of my close family to come visit and get settled before I get all my workshop stuff set up. In the mean time I started doing a little fun project to get my hands readjusted to my blades and to get me in the modeling spirit; a papercraft version of the Metal Gear Rex!
It took me a few days to do this and I must say for my first complicated piece of paper cutting I am pretty pleased. I think I may do a few more papercraft projects soon such as Vaan from final fantasy XII, and if I feel brave maybe a papercraft Deep Striker. Although that may kill me. haha. Or my printer toner. I used 110 lb. card stock for the paper, white "elmer's" glue, and a couple Xacto blades. It took about 6 sheets of paper for the parts, and 1 for the instructions. It also had the experimental mech on the sheets but I dunno if I'll finish that one or not. I think this was intended to be larger but when we printed it out we shrunk the pages down some, which added to the challenge of cutting insanely small parts. Well I hope my fellow nerds like it! I know a certain Sneeper who's a fellow Rex enthusiast. Hopefully I can update you guys on my LG in the next month! More pics:
Stay tuned mechaholics...
I'm not dead, I just haven't had a chance to unpack all my modeling stuffs yet. And yes for any of you that want it I will still make a tutorial on scratch building once I get my stuff all set up and I've practiced a bit again. I'm just waiting on some of my close family to come visit and get settled before I get all my workshop stuff set up. In the mean time I started doing a little fun project to get my hands readjusted to my blades and to get me in the modeling spirit; a papercraft version of the Metal Gear Rex!
It took me a few days to do this and I must say for my first complicated piece of paper cutting I am pretty pleased. I think I may do a few more papercraft projects soon such as Vaan from final fantasy XII, and if I feel brave maybe a papercraft Deep Striker. Although that may kill me. haha. Or my printer toner. I used 110 lb. card stock for the paper, white "elmer's" glue, and a couple Xacto blades. It took about 6 sheets of paper for the parts, and 1 for the instructions. It also had the experimental mech on the sheets but I dunno if I'll finish that one or not. I think this was intended to be larger but when we printed it out we shrunk the pages down some, which added to the challenge of cutting insanely small parts. Well I hope my fellow nerds like it! I know a certain Sneeper who's a fellow Rex enthusiast. Hopefully I can update you guys on my LG in the next month! More pics:
Stay tuned mechaholics...
Saturday, October 27, 2012
Decal Design
Hey all,
I think I have the close to finalized versions of what the decal are going to look like. This is just for the large trace line decals that I drew up in this outline sketch:
I did add some angles and variations to them as the ones in the sketch were just for a rough idea. This of course doesn't include all the little various warnings and small text decals, it's just for those unique to this kit. Here is the sheet, the layout of the decals may change to suit a more efficient use of page space, but you'll get the idea.
I'm going to work with
I think I have the close to finalized versions of what the decal are going to look like. This is just for the large trace line decals that I drew up in this outline sketch:
I did add some angles and variations to them as the ones in the sketch were just for a rough idea. This of course doesn't include all the little various warnings and small text decals, it's just for those unique to this kit. Here is the sheet, the layout of the decals may change to suit a more efficient use of page space, but you'll get the idea.
![]() |
| With the Part Outlines |
![]() |
| Without the Part Outlines or Path Strokes |
Labels:
1/100,
casting,
custom,
garage kit,
gundam,
handeye,
helmos,
hobby,
kit,
lanzegeist,
mecha,
model,
model kit,
scifi,
scratch build,
thehelmosengine
Subscribe to:
Posts (Atom)