Monday, May 13, 2013

SD Gundam Tattoo

Hey All,
   Still don't have my workshop setup yet, but in the mean time I've gotten a sweet 1/4 sleeve tattoo started (and almost done) showing a SD RX-78-2 and a SD Char's Zaku II fighting in a cartoony city.

Current
The outlines will be done next session.

A tattoo artist name Terry Peek has been working on it for me.  He lives

Wednesday, May 1, 2013

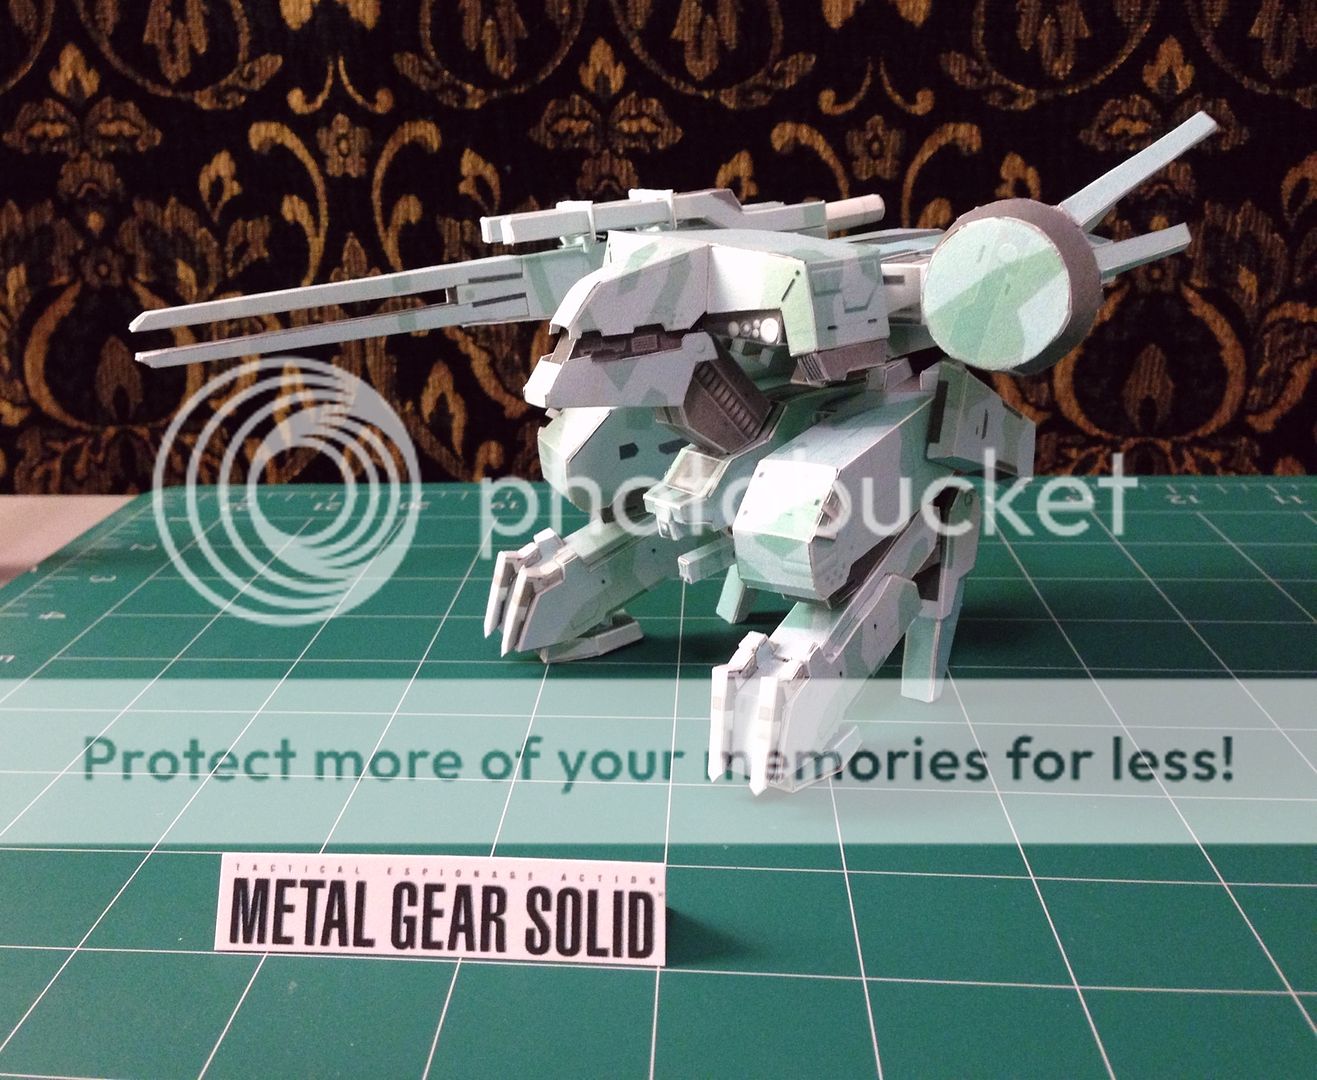
Papercraft Metal Gear Rex.....P.S. I'm not dead!

Hey All,
    I'm not dead, I just haven't had a chance to unpack all my modeling stuffs yet.  And yes for any of you that want it I will still make a tutorial on scratch building once I get my stuff all set up and I've practiced a bit again.  I'm just waiting on some of my close family to come visit and get settled before I get all my workshop stuff set up.  In the mean time I started doing a little fun project to get my hands readjusted to my blades and to get me in the modeling spirit; a papercraft version of the Metal Gear Rex!

  It took me a few days to do this and I must say for my first complicated piece of paper cutting I am pretty pleased.  I think I may do a few more papercraft projects soon such as Vaan from final fantasy XII, and if I feel brave maybe a papercraft Deep Striker.  Although that may kill me.  haha.  Or my printer toner.  I used 110 lb. card stock for the paper, white "elmer's" glue, and a couple Xacto blades.  It took about 6 sheets of paper for the parts, and 1 for the instructions.  It also had the experimental mech on the sheets but I dunno if I'll finish that one or not.  I think this was intended to be larger but when we printed it out we shrunk the pages down some, which added to the challenge of cutting insanely small parts.  Well I hope my fellow nerds like it!  I know a certain Sneeper who's a fellow Rex enthusiast.  Hopefully I can update you guys on my LG in the next month! More pics:


Stay tuned mechaholics...


Saturday, October 27, 2012

Decal Design

Hey all,
   I think I have the close to finalized versions of what the decal are going to look like.  This is just for the large trace line decals that I drew up in this outline sketch:

I did add some angles and variations to them as the ones in the sketch were just for a rough idea.  This of course doesn't include all the little various warnings and small text decals, it's just for those unique to this kit.  Here is the sheet, the layout of the decals may change to suit a more efficient use of page space, but you'll get the idea.

With the Part Outlines
Without the Part Outlines or Path Strokes
I'm going to work with

Saturday, October 20, 2012

Sneeper's Badass 1/48 Nu

Hey All,
   Today's post is on Sneeper1980's badass G-System Evolve Nu Gundam.  We've been waiting for him to finish this bad boy for a while now, (I think over a year) but it was worth the wait.  It looks excellent!  Here before I go any further lets see what it looks like, then discussion.  (with myself hehe.)

First off let's cover his surface smoothness.  The texture is flawless, and I'm not sure but I don't think most resin kits come that way either from pour sprues to any debris in the molds.  (Although from what I hear G-System does an exceptional job)  This means Sneeper was sanding and puttying for months to get this kit looking flawless enough to paint.  A+ on that mate.

Next is the paint and topcoat.  Gorgeous.  Now typically I favor shaded and weathered kits when given the choice, but I have to say I couldn't love this kit any more than I do now.  I don't think shading or weathering would have made this kit look better, and I think his paint job is absolutely perfect.  (Again painting is not my strong suit were I to have one, but I love this work.)  The flat coat on top is just right as well and there is no trace of silvering or hazing.  He did his homework, and took his time.


Next is the decals, decal film opacity, placement, and panel lining.  Again,
this work is top notch.  The decals are straight, well placed, and there is no silvering whatsoever.  I can't imagine how long this must've taken.  The panel lines are all solid and contiguous, which is super hard to do perfectly IMO.  (But again I'm dumb with paint so grain of salt and all that.)  It brings out every little detail of this beautiful kit and makes Sneeper's kit a shelf topping showpiece.

Overall I can't find any flaws in his execution at all.  And I can be a critical dood when I want to be.  I'm trying to pick it apart and I can't, which is why this kit gets a spot in my Wall of Awesome Stuff.

If you want to see the mechalounge forum post for this kit you can check it out here.

If you wanna check out Sneeper1980's youtube channel you can find it here.

If you like the work I suggest you go ahead and let him know you appreciate how great this work is, and as always feel free to join the forum at www.mechalounge.com.  It's where I post my work now and we welcome any and all to join us in the community.  At mechalounge we are all trying to focus on the fun and community aspect of our building, and I enjoy the people there a lot.  Again, great job Sneeper, this looks badass brother, I look forward to your next work!

Stay tuned mechaholics...

10/19/12 Update and Crowned King Sketch Concept

Hey all,
  Just dropping a little update photo of the parts we've made so far.  I had a problem with another mold having some rubber get ripped out, and it's on a crucial part, so I have to remake a few molds.  It's cool cuz I can do this simultaneously with other things so it's not too much of a drag.  Here is my photo update:


I've also been toying with what the Crowned King parts would look like.  I came up with this:

I may actually not make the crowned king parts part of the kit unless somebody asks for them, although I will make the molds just in case.  I thought about remaking a gun barrel part too to make a slightly longer range buster cannon for the Crowned King parts, which I may do eventually.  Right now I'm probably gonna focus on getting the original kit done.  Well I gotta go and do some sleepy stuffs. 

Stay tuned mechaholics...