Showing posts with label helmos. Show all posts

Sunday, September 8, 2013

Introduction to Scrach Building Part 1

Hey All,
   Since I was asked so politely by many on YouTube and finally had time, I made a tutorial on scratch building.  It's about an hour long and goes over every step of scratch building a part from nothing to a detailed primed part.  The focus isn't on painting so that parts not really as relevant I just showed it to acknowledge that the part is basically ready to paint.  Anyway I hope you guys like it, and if you find it useful or if you just love my gorgeous face share the video with someone you know.  The goal is to get more people into the hobby, and for me to get more subscribers on my YouTube page.  If I get enough subscribers or hits I will make another video teaching how to do other things such as more complicated SB methods, or perhaps how to cast replicate parts.  Here's the video:


Stay tuned mechaholics...

Monday, July 29, 2013

Fleischer Truppe Figure Sculpt: Part One

Hey All,
   I felt a bit of inspiration today so I started my sculpt for what I'm calling the Fleischer Truppe.  I think that roughly translates to butcher squad in German.  The concept is that this is a chemically enhanced and engineered human soldier who fights what are called "smiling men".  The smiling men are humanoid predators that have the ability to unhinge their jaws, making their mouths open quite wide which makes their lips and mouths always look like they are smiling.  Long story short the name Fleischer Truppe is a name given to the soldiers who fight the smiling men to embolden the humans in their fight against the superior predators they fight.  This figure I'm sculpting is going to be a 12" figure with articulation all over, and hopefully good detail.  It's my first organic looking sculpt so I may have to rework or remake certain parts as I'm going, but that's how I work anyway so nothing new there.  I'm starting with the basic muscular humanoid form, and then I'm going to add the armor on top of that after the form is finished.  Here is what I did today.


I'm using sculpey for the sculpt.  I find that the super sculpey is better for this work as it holds fine details well, and is easy to bake quickly.  For the larger forms I've just rolled up bits of aluminum foil and just sculpted a thin layer of sculpey on top of that.  

Wednesday, July 24, 2013

SD Gundam Tattoo Update

Hey all,
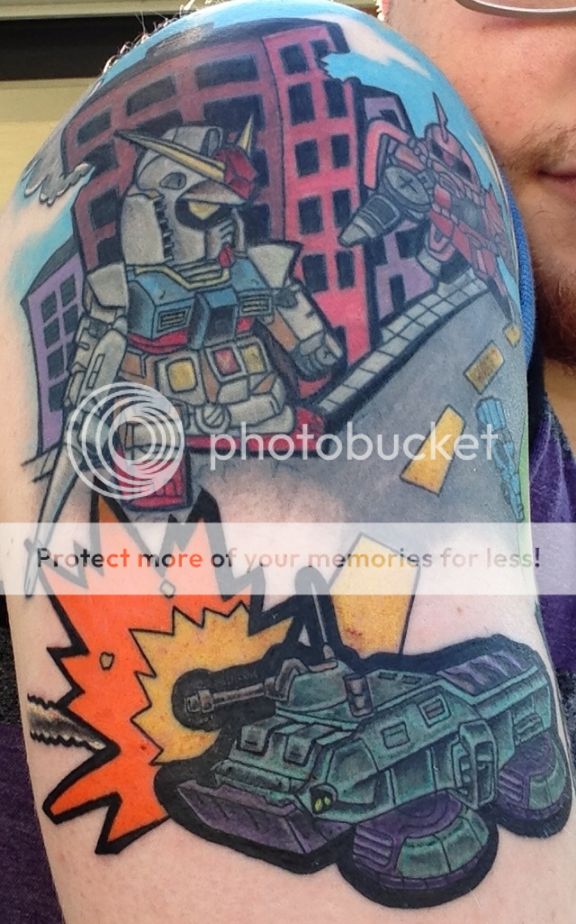
  Just a brief update.  I recently got a touch up on the previous work done and added a hover truck getting hit by a missile to the mix.  This part brings a ton of really beautiful color to it like the vivid orange of the explosion and the seafoam green and purples of the hover truck.  Terry did a great job on the shading and the thick outlines are looking awesome so far.  Not sure if I will thicken the other outlines on my arm already or just keep them different sizes like a weird stylized cartoon.  Either way here is the most recent addition. 

In other news I have started doing an action figure sculpt with the intent to cast it. I'm calling it the "Fleischer Truppe" or what I think is roughly Butcher Squad in German.  I have some preliminary sketches done up and I bought some sculpey and some more tools to get started.  I have the rifle, the helmet, the leg armor, and the chest armor planned, but that's it so far.  I've sculpted most of the right hand so far too.  hehe.  I'm going to make it full articulated and ball jointed where I can. 

I'm still waiting to buy a few strip fluorescent lights for the garage to finish painting my box art for the Lanzegeist which I still have every intention of selling 10.  Sorry for the long delay getting back into modeling friends, I'm just still getting adjusted after moving twice.  It won't be long now.

Stay tuned mechaholics...

Tuesday, June 25, 2013

SD Gundam Tattoo Part Deux

Current (forgive any distortion in the photo, it's a pain in the ass to take a picture of your own shoulder.)


Hey All,
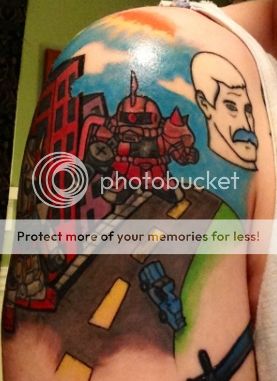
   This past weekend I had a couple sessions with Terry Peek, the artist who's been working on my SD gundam piece, and he made the progress I was hoping for.  If you recall from my last post my shoulder was lookin a bit rough from the first bit of work, but now that it had healed up nice and he was back in town, we got to work on it and get the piece closer to what I want.  Now keep in mind that he is still going to do more work on it such as refilling the windows in the buildings, and doing touch ups on color fills and black, adding thicker lines here and there, but I must say I'm really happy with how this is turning out.  I still haven't decided if I want to thicken up the outer outline of the Char's Zaku II yet, but I will make up my mind before my next session.  Oh and I also got a new addition to the work, a cute lil Ball!
Ball!
 It's placed right under the crunched up car you see beneath the Char's Zaku II, and it looks all distorted because it's bending around my arm.  Now all of this looks a bit funky as my skin is puffy from the work, and the top photo is shiny from the aquaphor, but after some healing and a few more touch ups this piece will be golden.  Now I gotta start planning the next additions, and how to tie the background together!

Stay tuned mechaholics...


Saturday, October 27, 2012

Decal Design

Hey all,
   I think I have the close to finalized versions of what the decal are going to look like.  This is just for the large trace line decals that I drew up in this outline sketch:

I did add some angles and variations to them as the ones in the sketch were just for a rough idea.  This of course doesn't include all the little various warnings and small text decals, it's just for those unique to this kit.  Here is the sheet, the layout of the decals may change to suit a more efficient use of page space, but you'll get the idea.

With the Part Outlines
Without the Part Outlines or Path Strokes
I'm going to work with

Thursday, October 11, 2012

LG Crowned King Armor pack and Casting Update

Hey all,
   I recently had an issue with one of the molds where a piece of the mold rubber just broke off.  The part was the crotch/tailfin armor and that mold was a pain to make.  So I had a little soul searching to do to decide how to proceed.  I basically just decided to remake the mold as it was, and the molds for a few other parts where the mold was getting worn out for some reason or another.  This is what I spent the last weekend doing with wifey between other things.  The problem came in on Monday night when I went to separate the molds.  They had sealed together.  It turns out that I had used Mann Ease release 300 mold release instead of 200, and the silicone had basically just cured to itself right through the release, since the 300 isn't made for releasing rubber from rubber.  After I had a major rage spell, I tried to cut the parts out of the molds.  I ended up snapping the prototype for the crotch armor altogether.  I really only needed to still make the casts for the white versions of the kit with this mold, but still now no mold, no parts.  Well I came up with a solution that I liked so I went with it.  The Crowned King Armor pack.  The deal is that the white casts of the kit are going to come with a few extra add ons that have a little bit heavier armor than the gray casts.  This solution allowed me to make a new crotch armor piece with a little bit thicker plating for the armor, and to make a few new neat extra parts that will basically just be a neat difference between the gray and white casts.  Here are the basics parts of the Armor Pack.

-New optional head crest
-New optional bicep armor
-New optional front skirt armor
-New optional Hulkatr Cannon weight block
-New optional lower leg armor
-for the white kits a mandatory different heavy armor tailfin cover

Also here is my casting update photo keeping in mind that I'm two and a half weekend (more casting on weekend days) days behind schedule:


Friday, October 5, 2012

Lanzegeist Casting Update!

Hey all,
   I just wanted to do an update showing my progress with the kit casting.  Here is a photo of the parts that the wife and I have poured so far.

What we are doing is basically pouring the entire quantity that we need for each part to make 10 kits, and then moving on to the next set of parts.  It seems to be the most efficient way.  Like I said I am going to be casting 10 copies of the kit before we move, and so far I have to say 8 of them are reserved.  If you have let me know that you want one I appreciate it, but you may want to do so again so I know for sure.  If the number of kits requested is above 10 I may make a few exceptions up to maybe 12-14, but no promises as I do have time constraints and such.  So again if you want a kit cast, make sure to either comment below or better yet email me at onecoldnight@yahoo.com and use the subject header "lanzegeist kit".  That way I'll know to add you to my list and make sure yours is reserved.

Here is a video update showing basically what you see above, but with the moving pictures of a cinematograph!


Video link in case video is not embedded correctly:  Lanzegeist Casting Update Video!


Tuesday, October 2, 2012

Good news and bad news

Hey all,
    I guess the blog title sounds a bit more ominous than it really is, but it's been a day of mixed things.  I had planned to print out the drekky instruction manual and finish up the packing for sending out, but that was before our male ferret started having seizures and had to be put down.  It's been a rough year for relatives passing away.  Le sigh.  And the not necessarily comparable but still downer problem I was having with a particular mold today just compounded my already kinda crappy day.  (I have a particular mold where the surface of the mold keeps getting a weird matte surface quality to a part that is usually pretty glossy, the parts are still good but it just makes it look like there is a surface quality flaw and I don't know why it's happening.)  So today I just haven't really felt much in the mood to do anything productive. 

  I did, however decide that it would be a good day to maybe start rounding up the cured lenses and toy with them for a few minutes.

I'm pleased that a good portion of the lenses came out wonderful.  Some were oddly shaped or distorted and gotta be tossed out, but most were good.

I took one of my old kits that I modified a little bit when I was first learning to model (an old crappish kampfer mod I did) and cemented on a little bit oversized pink lens.  I used pink as in the animations usually the mono eyed mobile suits have pink eyes when the suit is on.  I used a slightly oversized eye because it catches the light a little better and shows off the clarity.  The smaller better sized version is harder to photograph well, but I do have plenty of those too.  I think I'm gonna use these for my SMS Kampfer conversion kit I'm gonna build soon.  Anyhow here are some eye lens photos.

DISCLAIMER: The work and paint on this kampfer head is old and I just grabbed it to test out the mono eye lens, it's not my current work.  

Thursday, September 27, 2012

Neon Clear Casting!

Hey All,
    The neon yellow clear beam saber blade finally cured enough to demold and I wanted to show it off. 

I gotta say I like the coloring.  I think it will look sweeter once it's dunked in future floor polish.  I'm gonna try out a pink one next I think. 

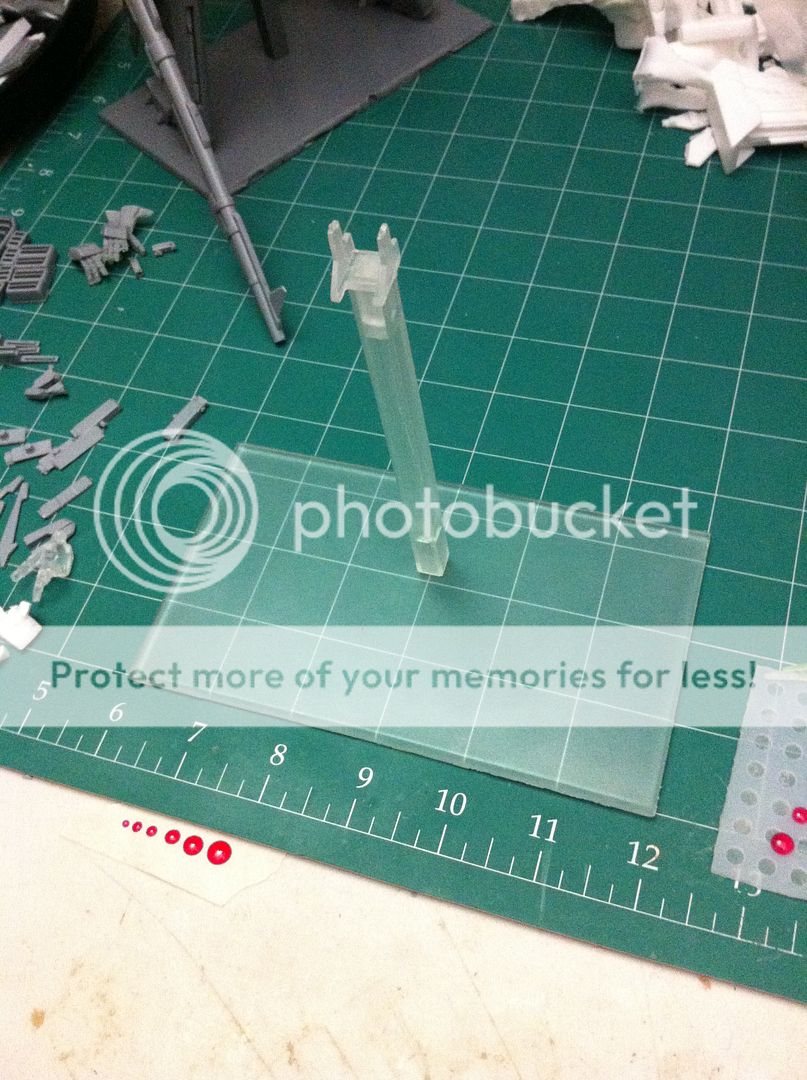
The clear stand was cured enough to demold too.  I gotta say I really like it!

It still needs a little bit more cure time to harden all the way as this clear stuff takes FOEVAH!  But it will add to the kit presentation a lot and I think I really may use these for the sellable kits.  I am going to try to have an update on the different color casts of the clear lens parts next.  I may pour those tomorrow night in a variety of colors and sizes.  I also have a friend who is starting up working with aluminum so we all may have the capability of designing and making our own custom aluminum parts soon!  But I'll fill you all in as that happens.  He's working on making the LG thruster vents in aluminum right now, but I'll fill you all in as that happens.

Stay tuned mechaholics...

Thursday, June 14, 2012

Drehksturm Box Art Completed! Decay is awesome.

Hey All,
   I'm not dead, in fact I've been incredibly busy working on my mecha projects lately.  I haven't posted them for a reason but I will fill you all in on them soon.  I do however have awesome news that most of you who read this (all four of you hehe) already know; Decay has finished the first cast of the Drehksturm!  Yay!!

I must say it looks amazing, the painting and weathering looks beautiful, and the decals that Decay and Kamm designed and printed are perfect.  I am totally proud to be a part of the making of this kit, even though I had nothing to do with the painting or the decals, which may just be the coolest part.  I have taken my two favorite photos of Decay's post on this, (which you can find here) and used them to make the top and bottom labels for the box art.  There will be a cool surprise relative to the box labels that I will share soon, but for now let us just bask in the glory that is the culmination of at least three modeler's hard work.  And yeah I know I'm totally feeling egotistical that I had a part in such a cool looking project.  My hat is off to Marc and Kamm as well.  Love you guys and great job.

BOX ART!!


Thanks to all of you guys who have shown an interest in getting one of the drehksturm conversion kits, (Russ) and know that I'm working on getting the instruction manual together now, and will be making the casts in the weeks to come.  It's finally warm enough to start up castin' again.  As Marc said in his post however, since this is my first kit casting it is not the most user friendly kit, and if you haven't worked with resin before I suggest you maybe hold off on getting one.  I'll make the instructions as complete and thorough as I can, but I didn't use any peg guides, which would have helped a bit in assembly.  Most of the part just snap on the inner frame quite well, but there are those that need to be glued that you will have to visually line up.  I'll go into more detail on that for any interested parties.  I'm only gonna maybe cast at most 8-10 of these, and probably only like 5 or so if there are interested people.  The price is gonna be about $55-60 just for the cost of the materials used, no profit for me.  I just want to see people making them.  You gotta pay your own shipping though.  I hope to see a couple of you guys try one of these out.

In a separate tangent I have a project that I've been working on for the last few months almost completed, and I can't wait to share it but I want it to be a surprise.  Needless to say it is something that I have put all of myself into, so hopefully it will show in the work.  I will hopefully be able to announce this really soon, maybe in a few weeks.

Stay tuned mechaholics...