
Thursday, August 18, 2011
Drehksturm WIP Part XVII and 1/2
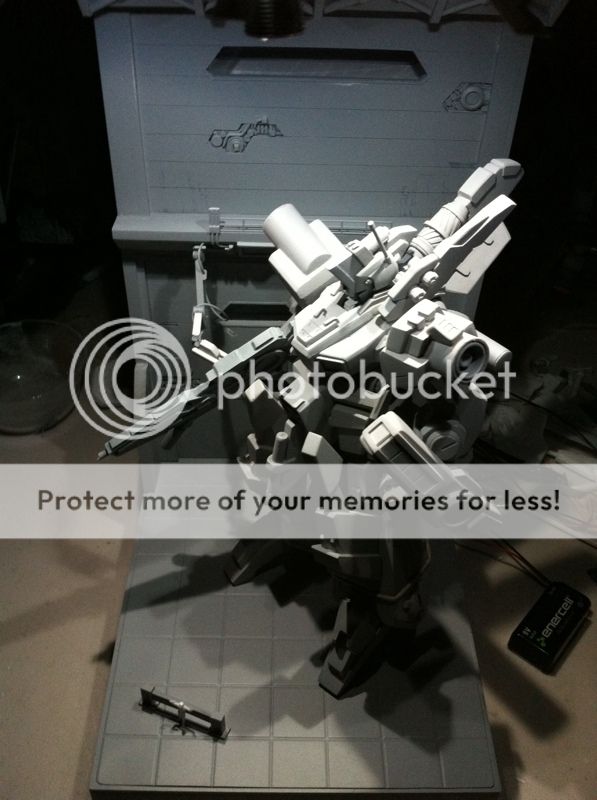
I'm going to keep this short as I didn't really do much today, I just did a mock up of what the Assault Type Drehksturm is going to look like completed. I haven't decided on a color scheme for mine yet, although I plan on making three. Here is the line drawing of it.
Wednesday, August 17, 2011
Drehksturm WIP Part XVII
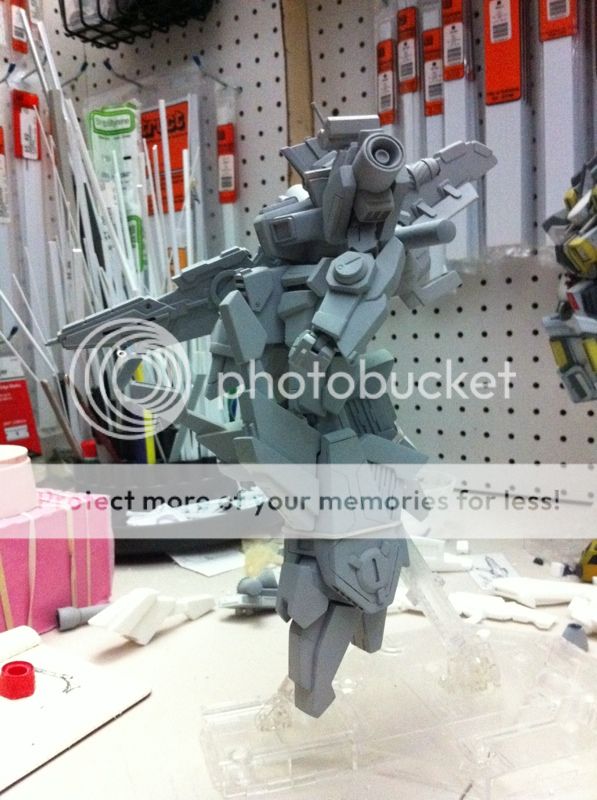
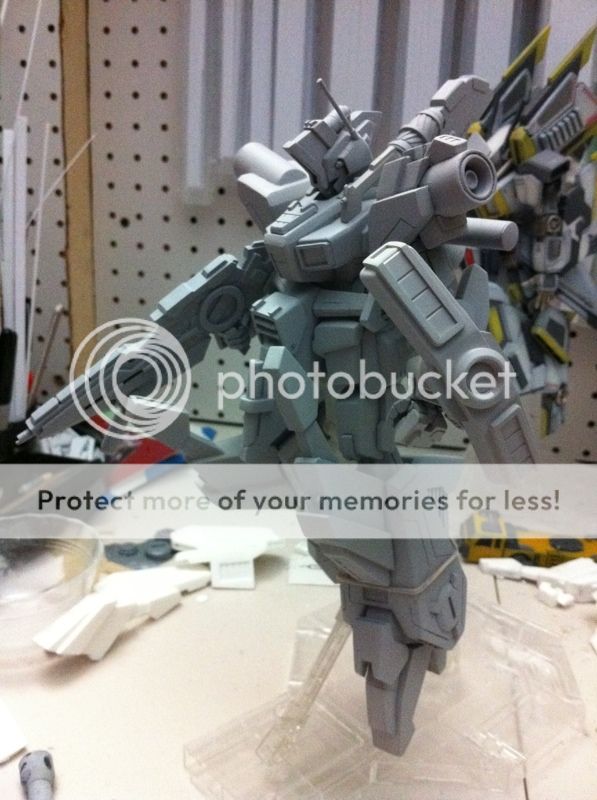
I made some more parts in the last couple days to give the Assault Type some more power, including an optional dual missile bay with beam sword attachment (to be used instead of the machine gun collar if one chooses), a smaller more skeletal looking short burst afterburner, and a Triple Cluster Bomb Pod to be mounted on the shoulder armor. Here are some shots:

Monday, August 15, 2011
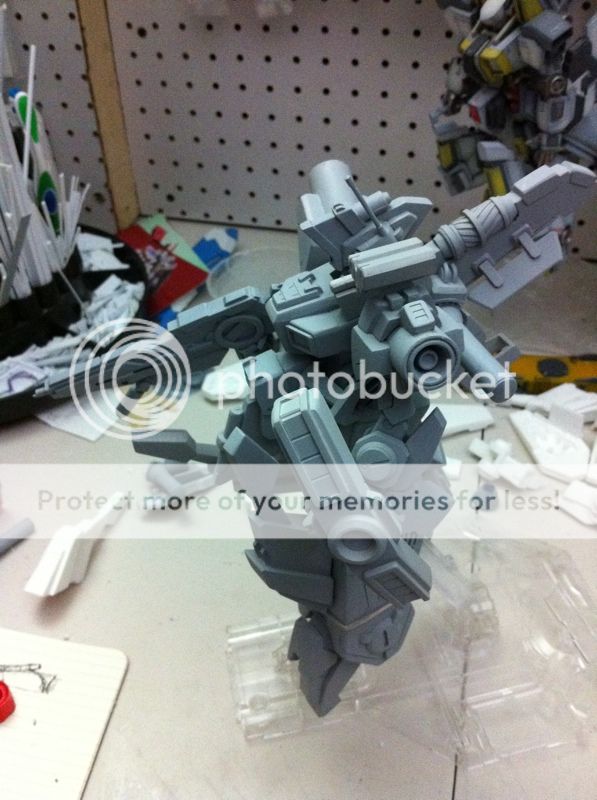
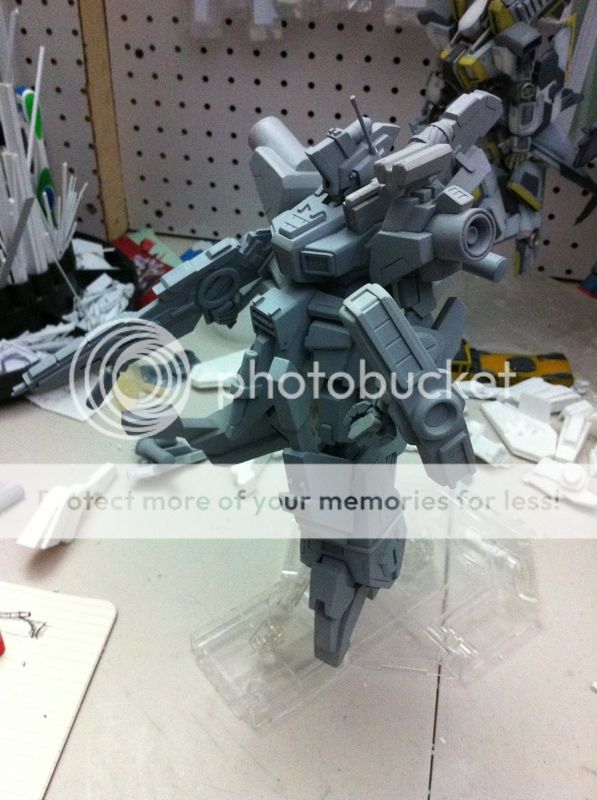
Drehksturm WIP Part XVI
Today I worked on three things, the shoulder paudron underside, the chest, and the collar option part. The shoulder pauldron part is just a thrust vent I added to give shape and provide function and lift. The chest part I just added a thin layer of plastic to provide depth. The collar option part is just a part I liked that I couldn't decide on between it and the other so I decided to make two different options for the kit. The part with the grenades and thruster on it are for the Recon Stealth Type, and the one with the heavy machine gun is the Assault Type. The Assault Type will also be getting a couple of other option parts like a different shape and type of thruster bell, and maybe a missile launcher if I decide on it. Here are some comparison shots between the Recon Stealth Type and The Assault Type

Recon Stealth Type:
Assault Type:
Thursday, August 11, 2011
Drehksturm WIP Part XV


Hey all, tonight I decided to work on the little armor part above the foot. It wasn't an extensive make, but I widened it some, added some shape to it, and added a vent on the top part facing the shin. I think it adds to the design overall. I may still add some detail later on, but for now I am pleased. Now I gotta warn you I took over 20 photos. PHOTOS!
Drehksturm WIP Part XIV
Yesterday I decided that the afterburners would benefit from a bit of detailing also, so I thought to add some more gear teeth to make it look like they rotate. It would make sense that the afterburners could rotate to allow the mech to change trajectory so I made it look like the cylinder had teeth on it and the mechanism above it would turn it via gear drive. The way I made the gear teeth is I cut out a strip of plastic in a thin long rectangle, then I shaved down a long rectangular rod into something like a triangle, then cut it in short little cuts to match the thin width of the plastic sheet. Then glue them down in the spacing you like and then wrap the plastic sheet onto the part and glue it. Now prepare for death by photos!


Monday, August 8, 2011
Drehksturm WIP Part XIII


I really need to go to sleep now. I have been sleep starved for about 5 days now and I'm beat. It was worth it though. hehe. Tonight I realized I need to replace my respirator, good thing I was only out priming for a short time period with the door open and fans on. Precautions are always nice. My moisture trap for my airbrush broke today too which is a bummer, but as things usually balance each other out my casts today were near perfect, and I made the gear teeth on the turbine on the stabilizer. I am needless to say pleased. Here is a buttload of photos from my build, be warned there are a lot. PHOTOS!
Sunday, August 7, 2011
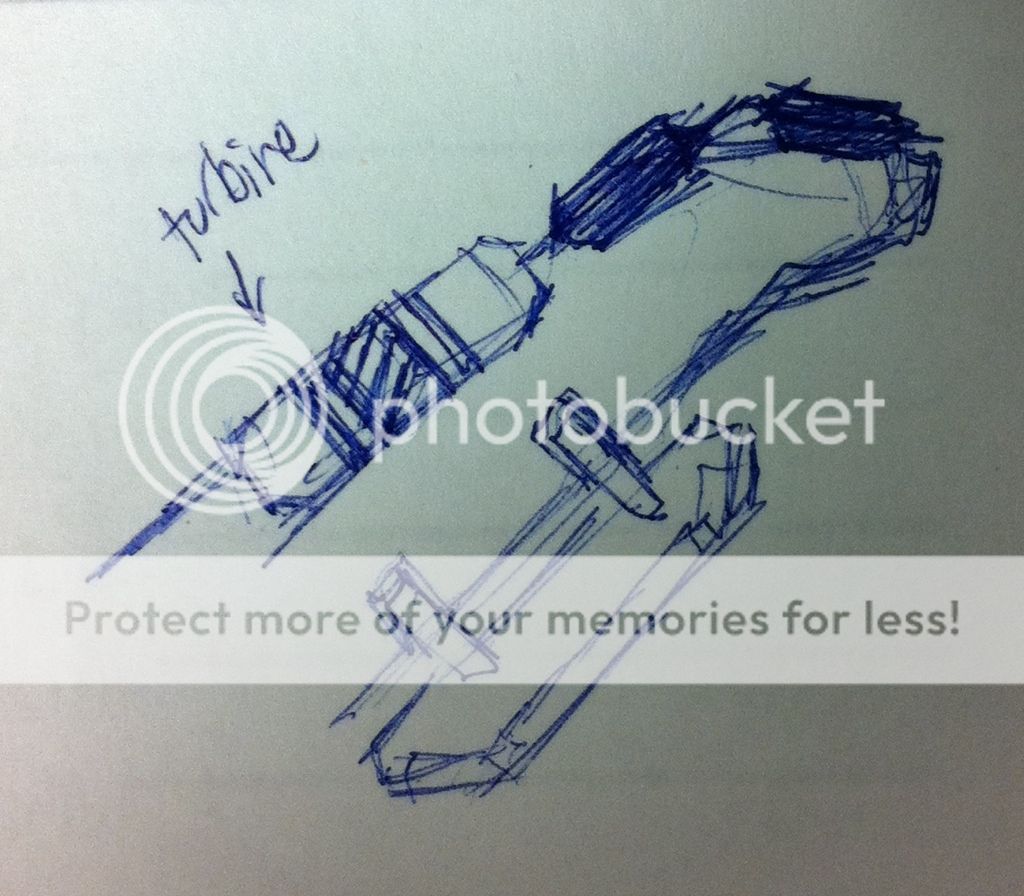
Drehksturm WIP Part XII

Wow that was a bit longer than I wanted. Well here is my plan for adding slanted gear teeth to the stablizer turbine.
Thursday, August 4, 2011
Drehksturm WIP Part XI
Today I decided to focus on the shoulder pauldron. Since the prototype part I've been working on is in some parts made of vinyl, it's a bit difficult to sand it down, so I made a spare one made of resin. But since the spare came out pretty good and wasn't too horrible on the surface quality, I decided that the prototype I had been using was fine to use for the casting for the final product. Long story short I am still gonna use the vinyl containing part to make the master. Anyway since I now had an extra shoulder pauldron I decided to use it for the photos so you can get a rough idea of how it will look in the finality of the project, except that the final casts will look like the more detailed shoulder but on both sides. Le sigh. Finality...sounds so.. final. harumph.

Subscribe to:
Posts (Atom)